


My Big Fat Greek Living Room
Hi,
For those of you who have been watching Channel 9’s Space Invaders show, thank you! The show is doing well, pulling in just over 1 million viewers each & every week.
So where do I start with this living room renovation? Well, I’m sure you’ve all watched that movie, My Big Fat Greek Wedding so this week I thought I’d have a cheeky play on that theme.
In one of our latest episodes, we threw a gyro into the mix & spiced things up with a story that’s been simmering in the pot since Season 2. Remember Maria & Steve? The couple with hearts bigger than a Greek feast, who’d welcome anyone into their home with open arms & probably a plate of moussaka? After we decked out their outdoor patio in 2022 into an entertaining paradise post-Maria’s victory lap around cancer, we came back for a second time. But this time, it’s not for the baklava. Maria’s health has sadly taken a detour, and she’s been couch-bound in her living room, a space that’s about as relaxing as a crowded Athens market on a hot summer’s day.
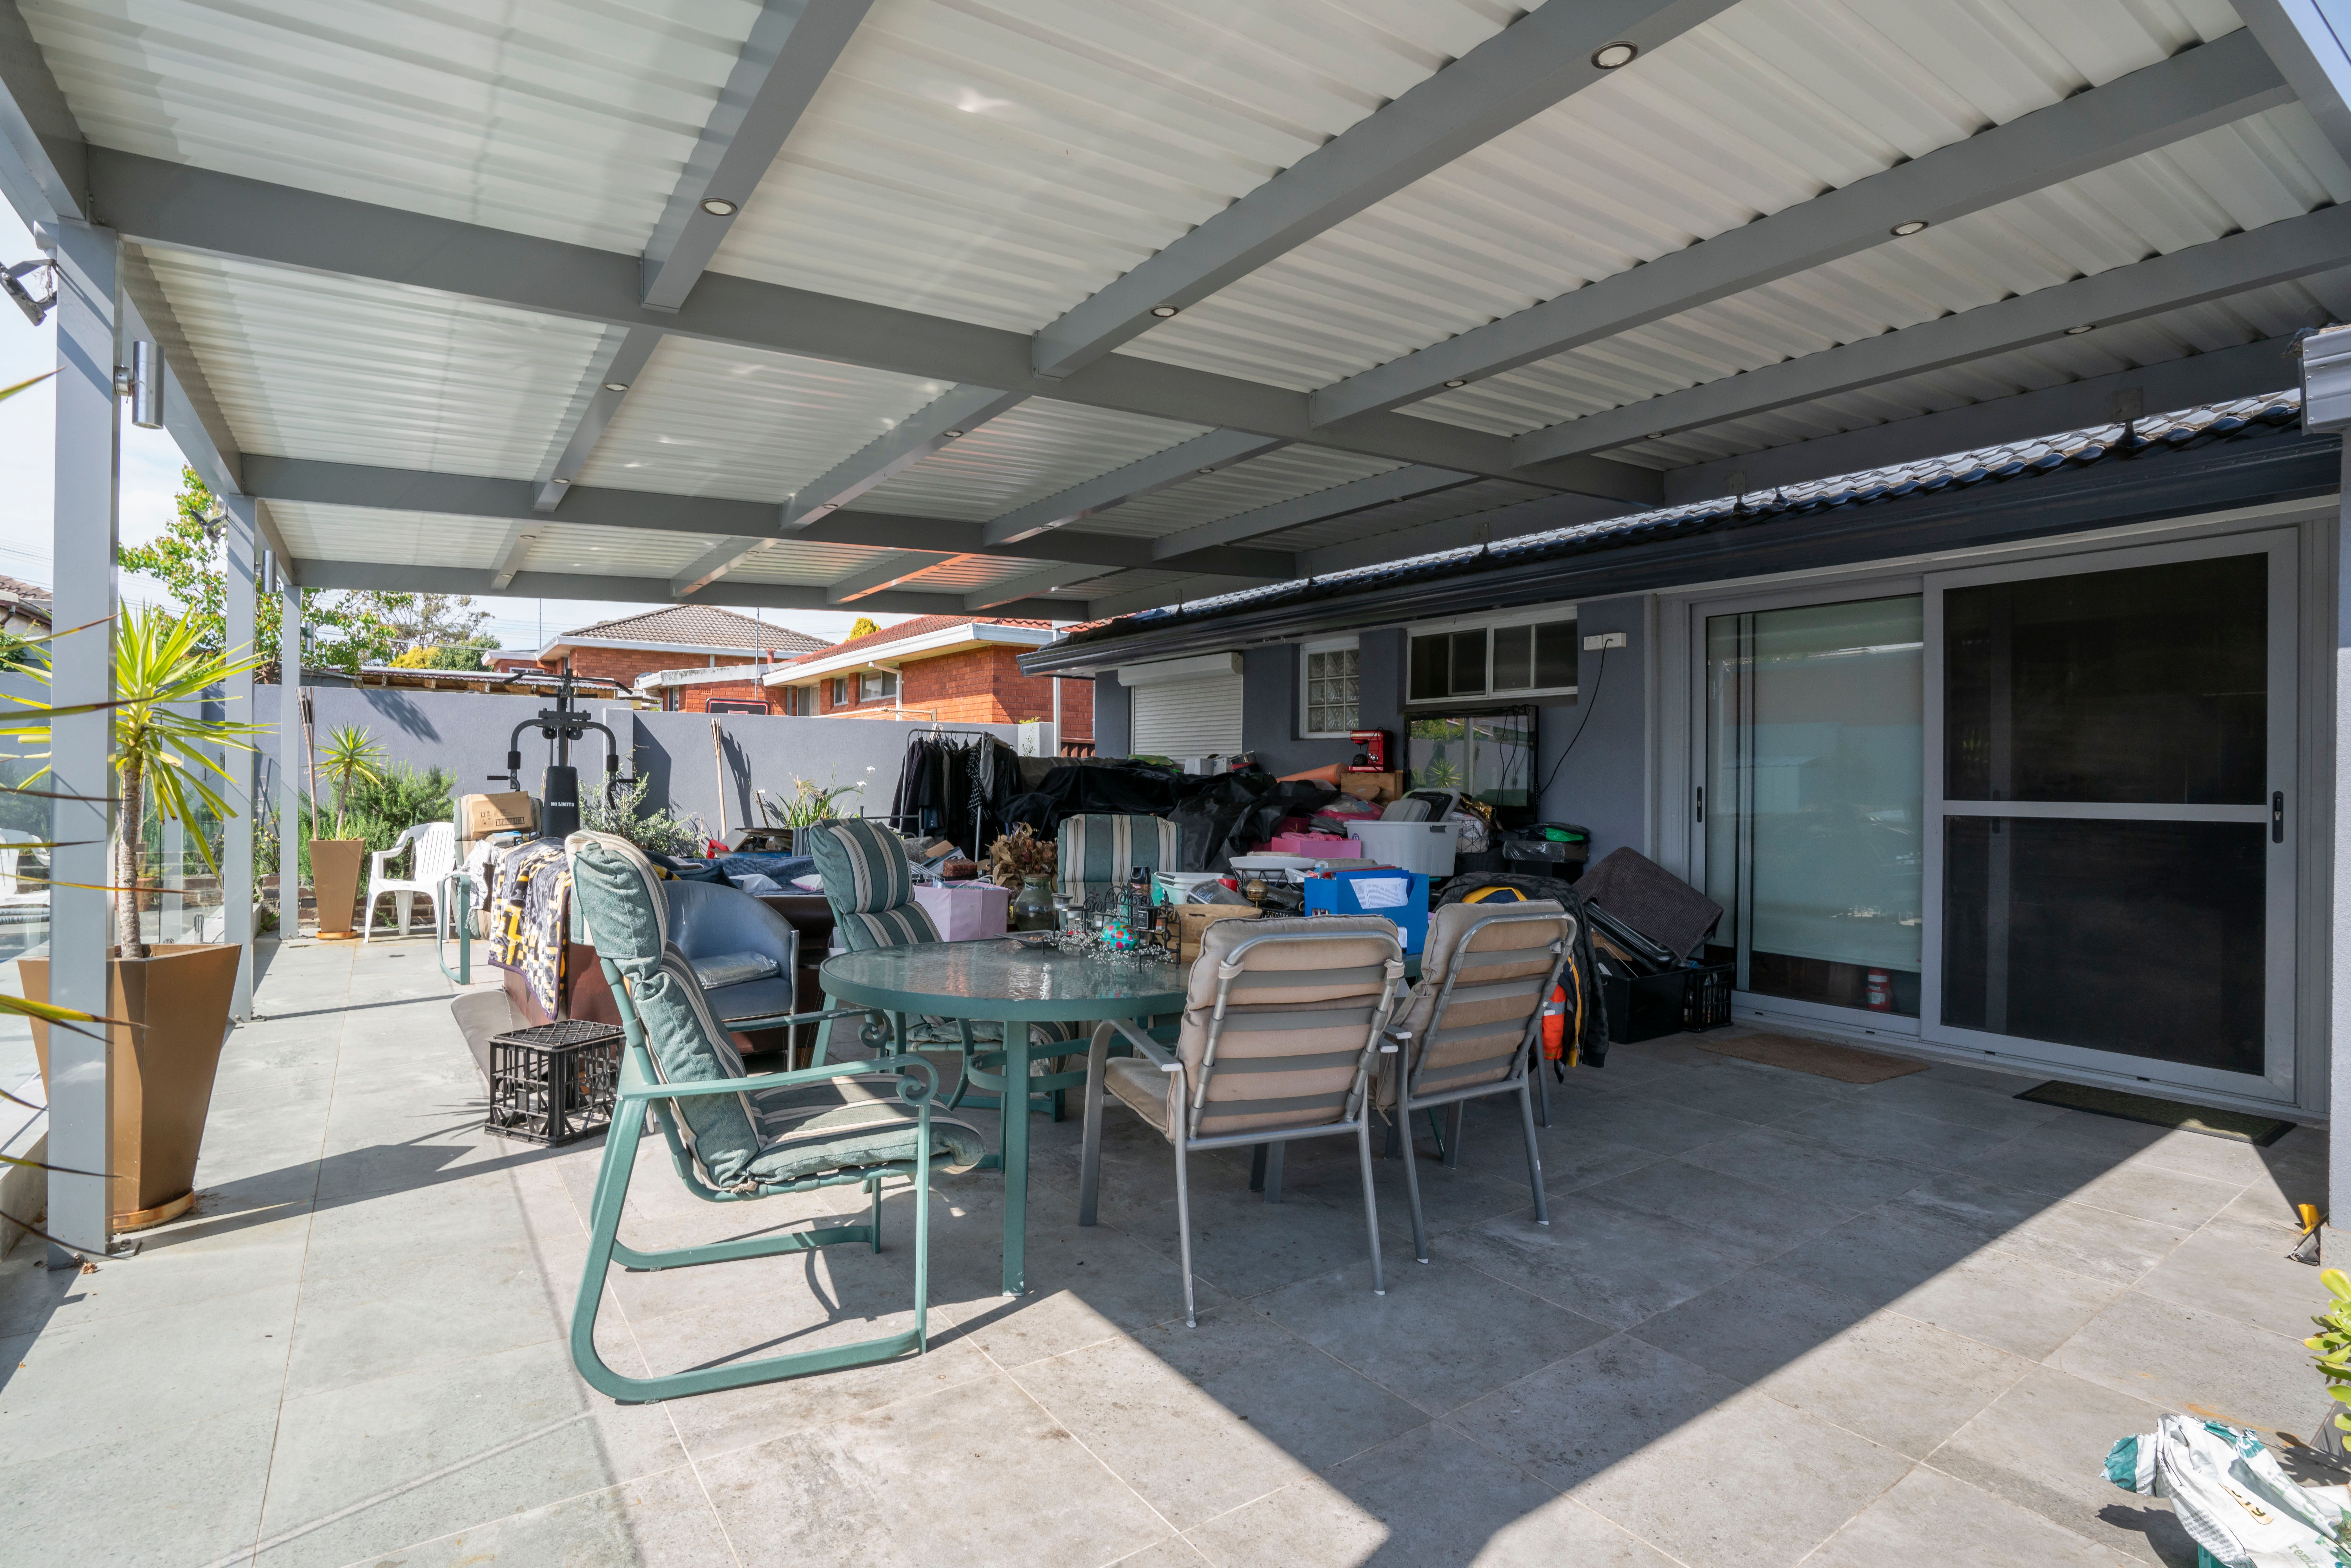
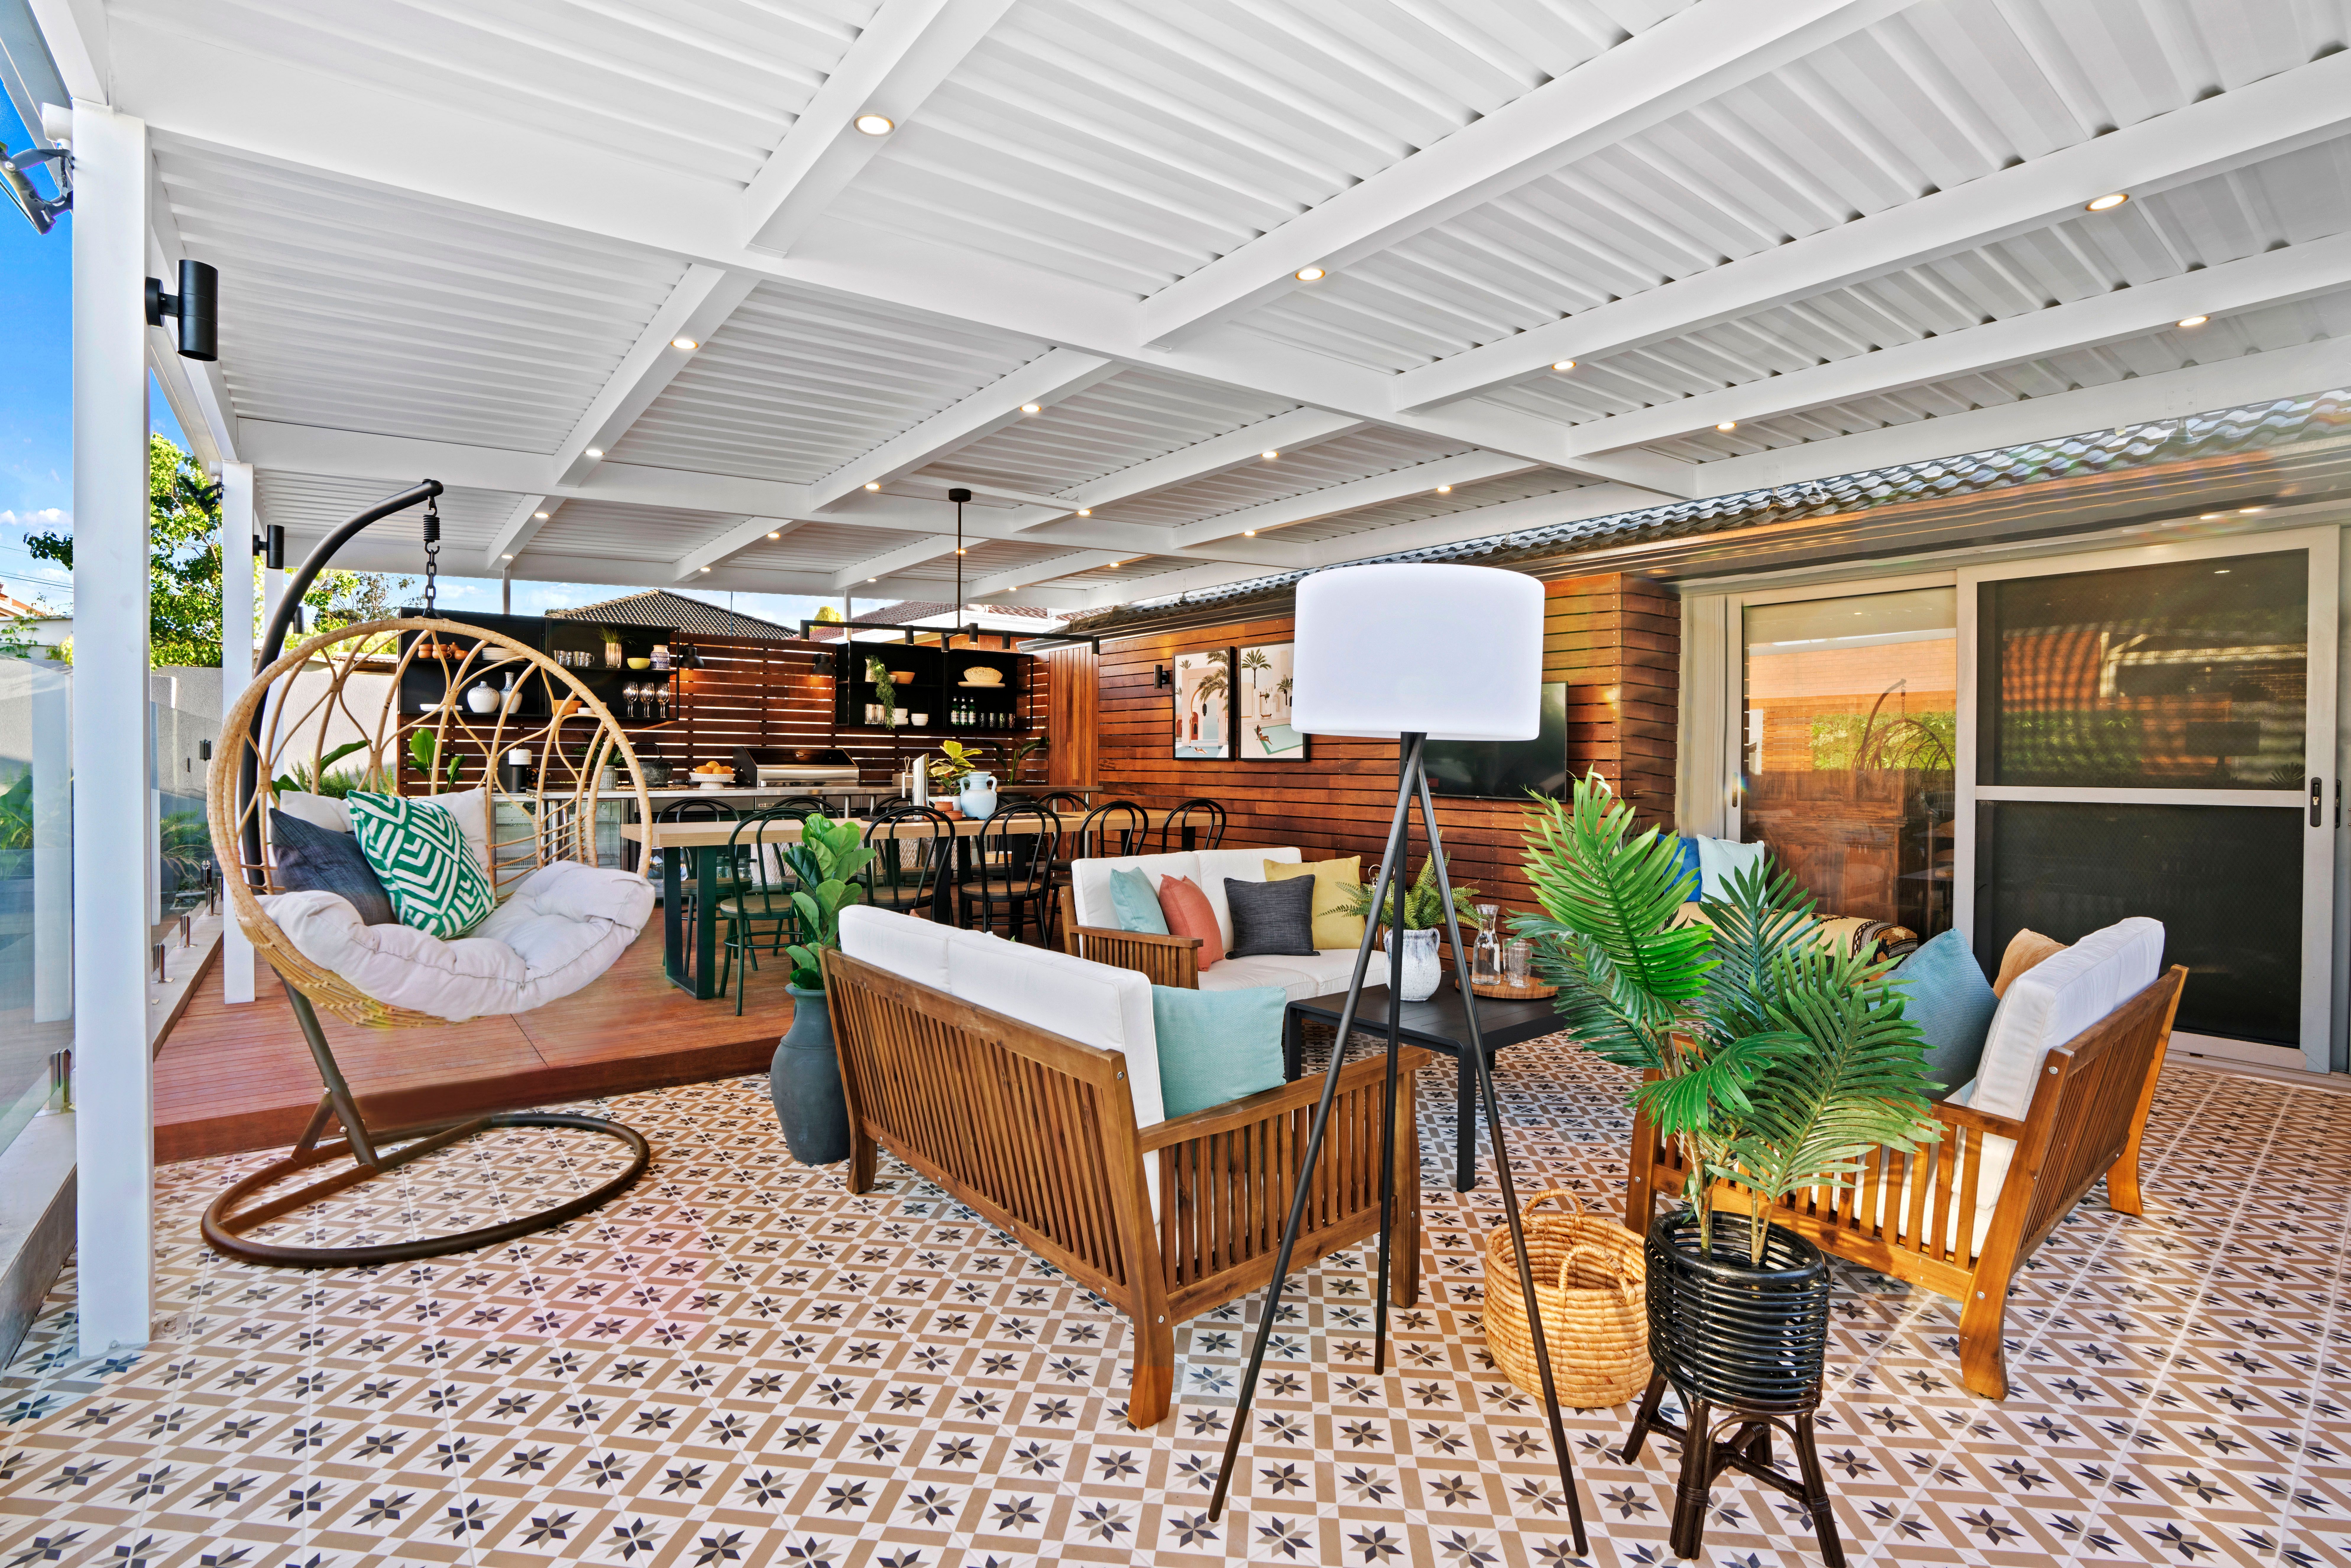
The rear patio we renovated in 2022 for Steve & Maria.
THE LIVING ROOM
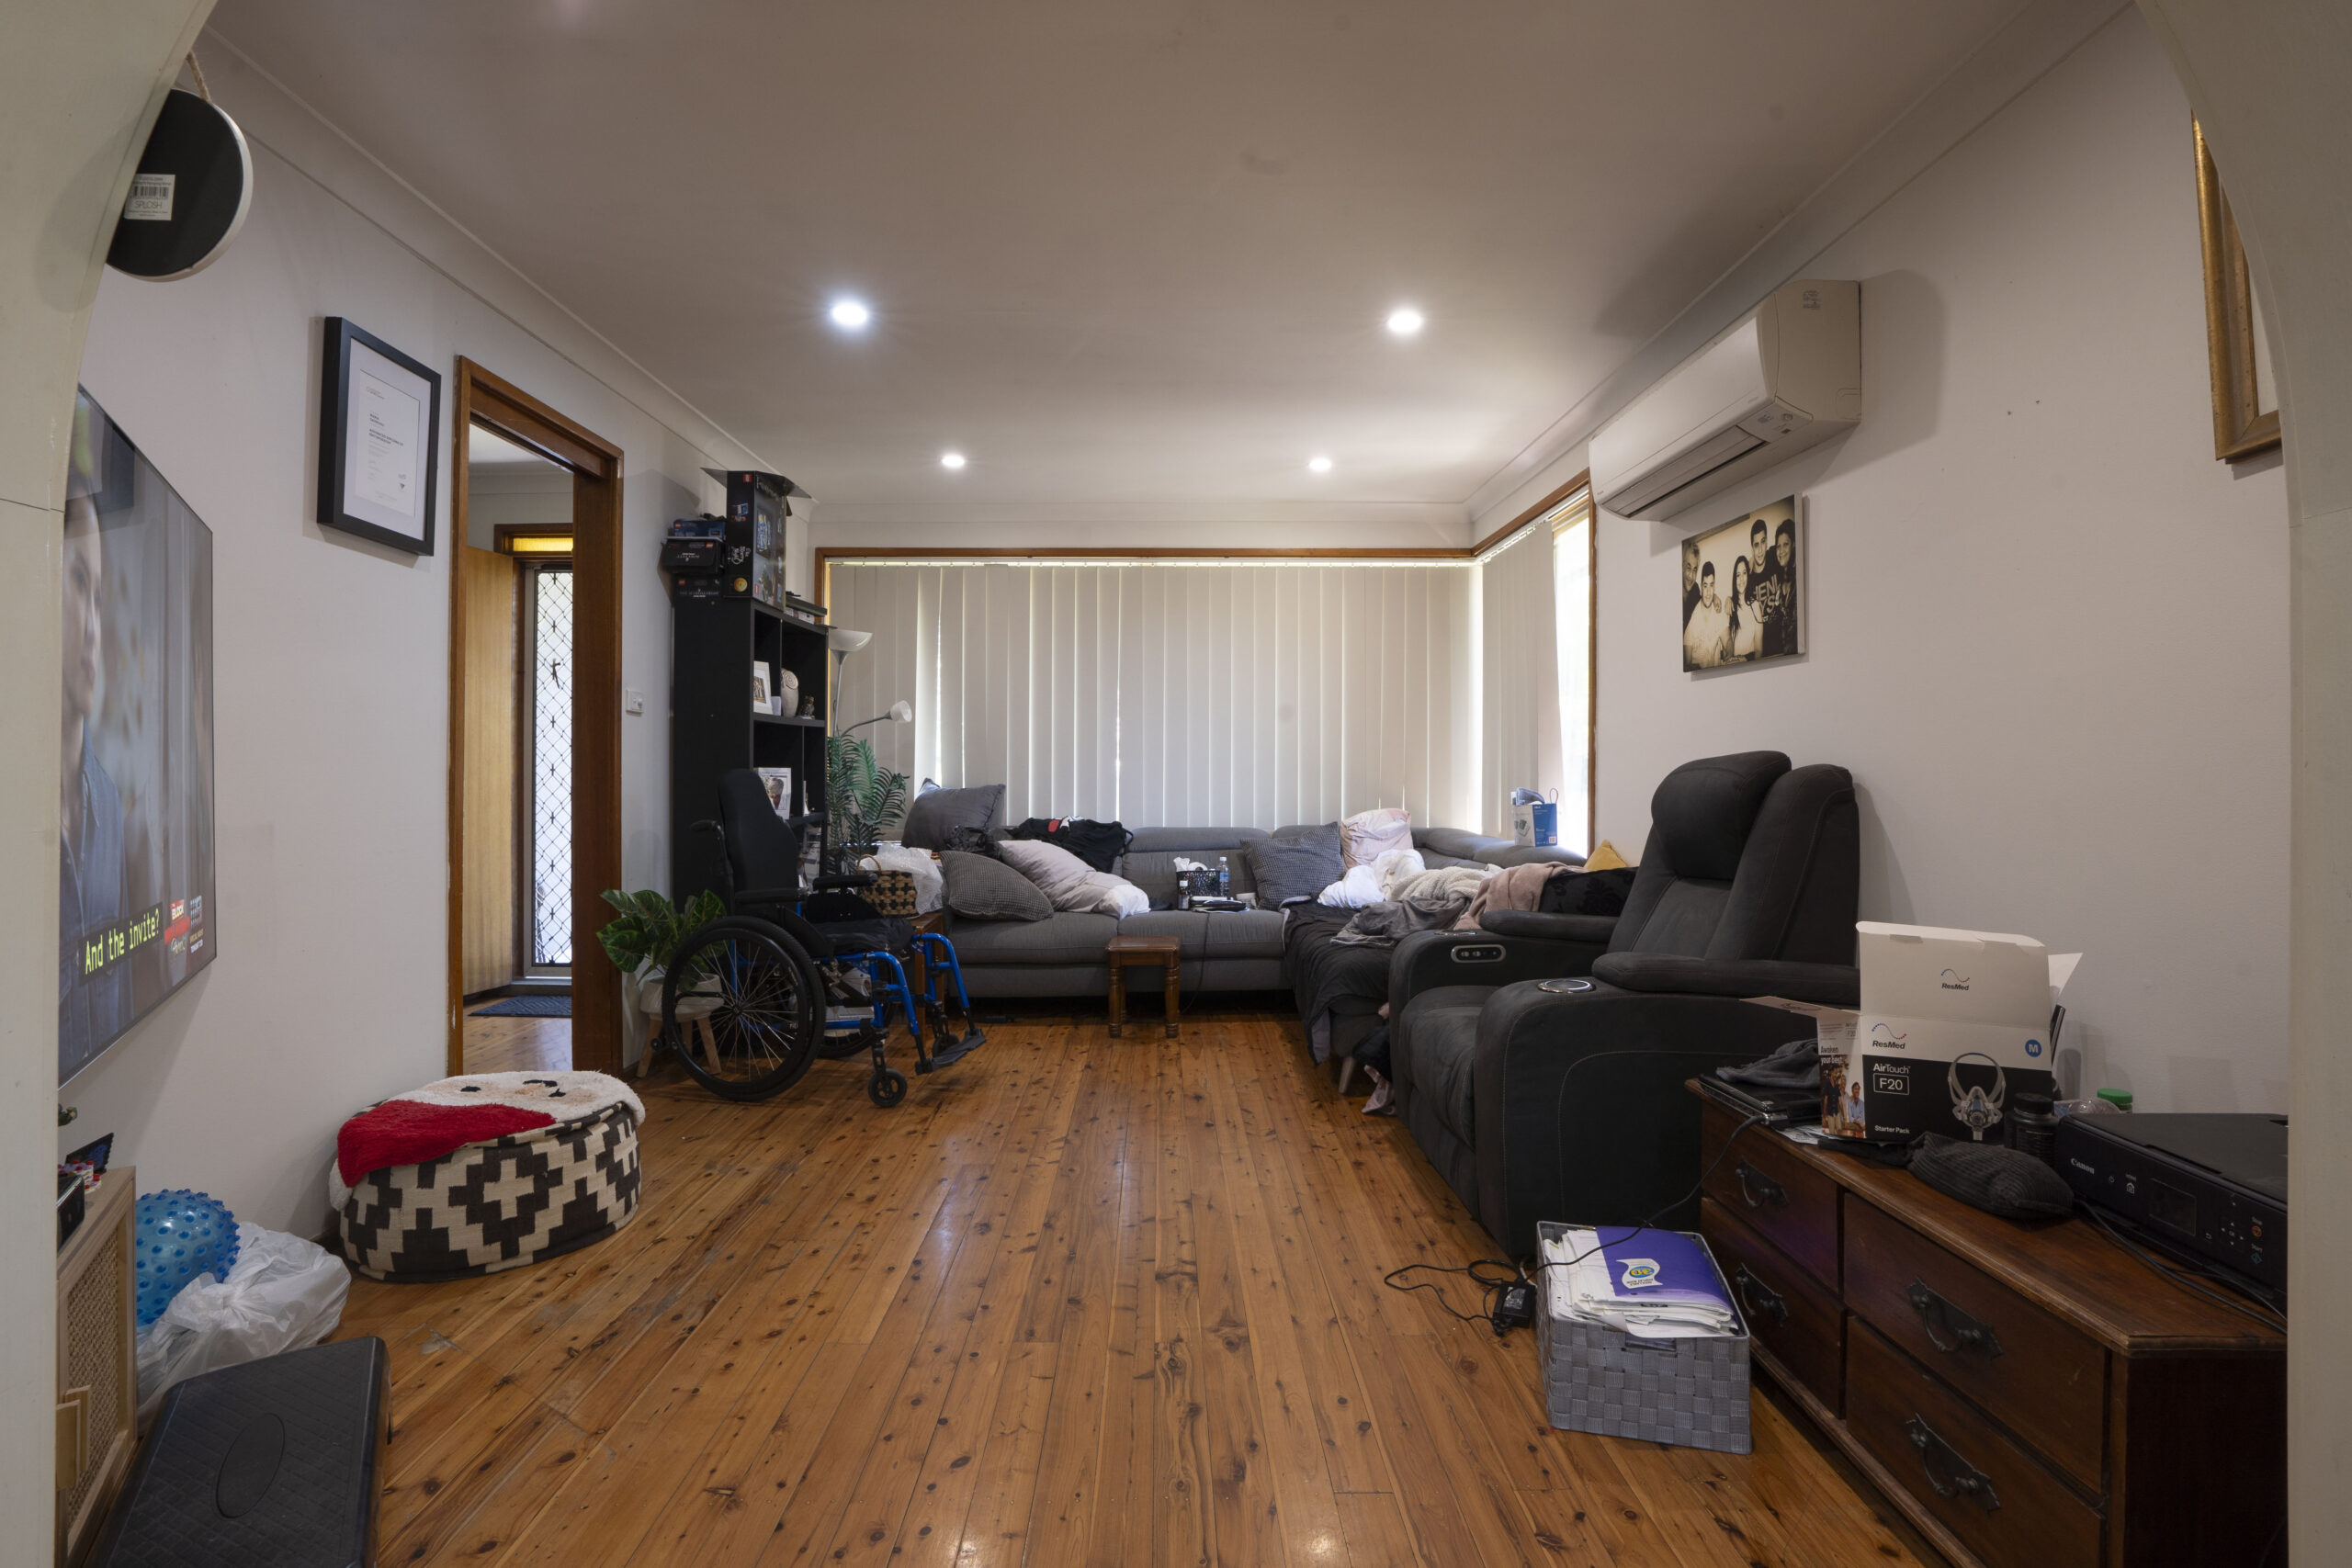
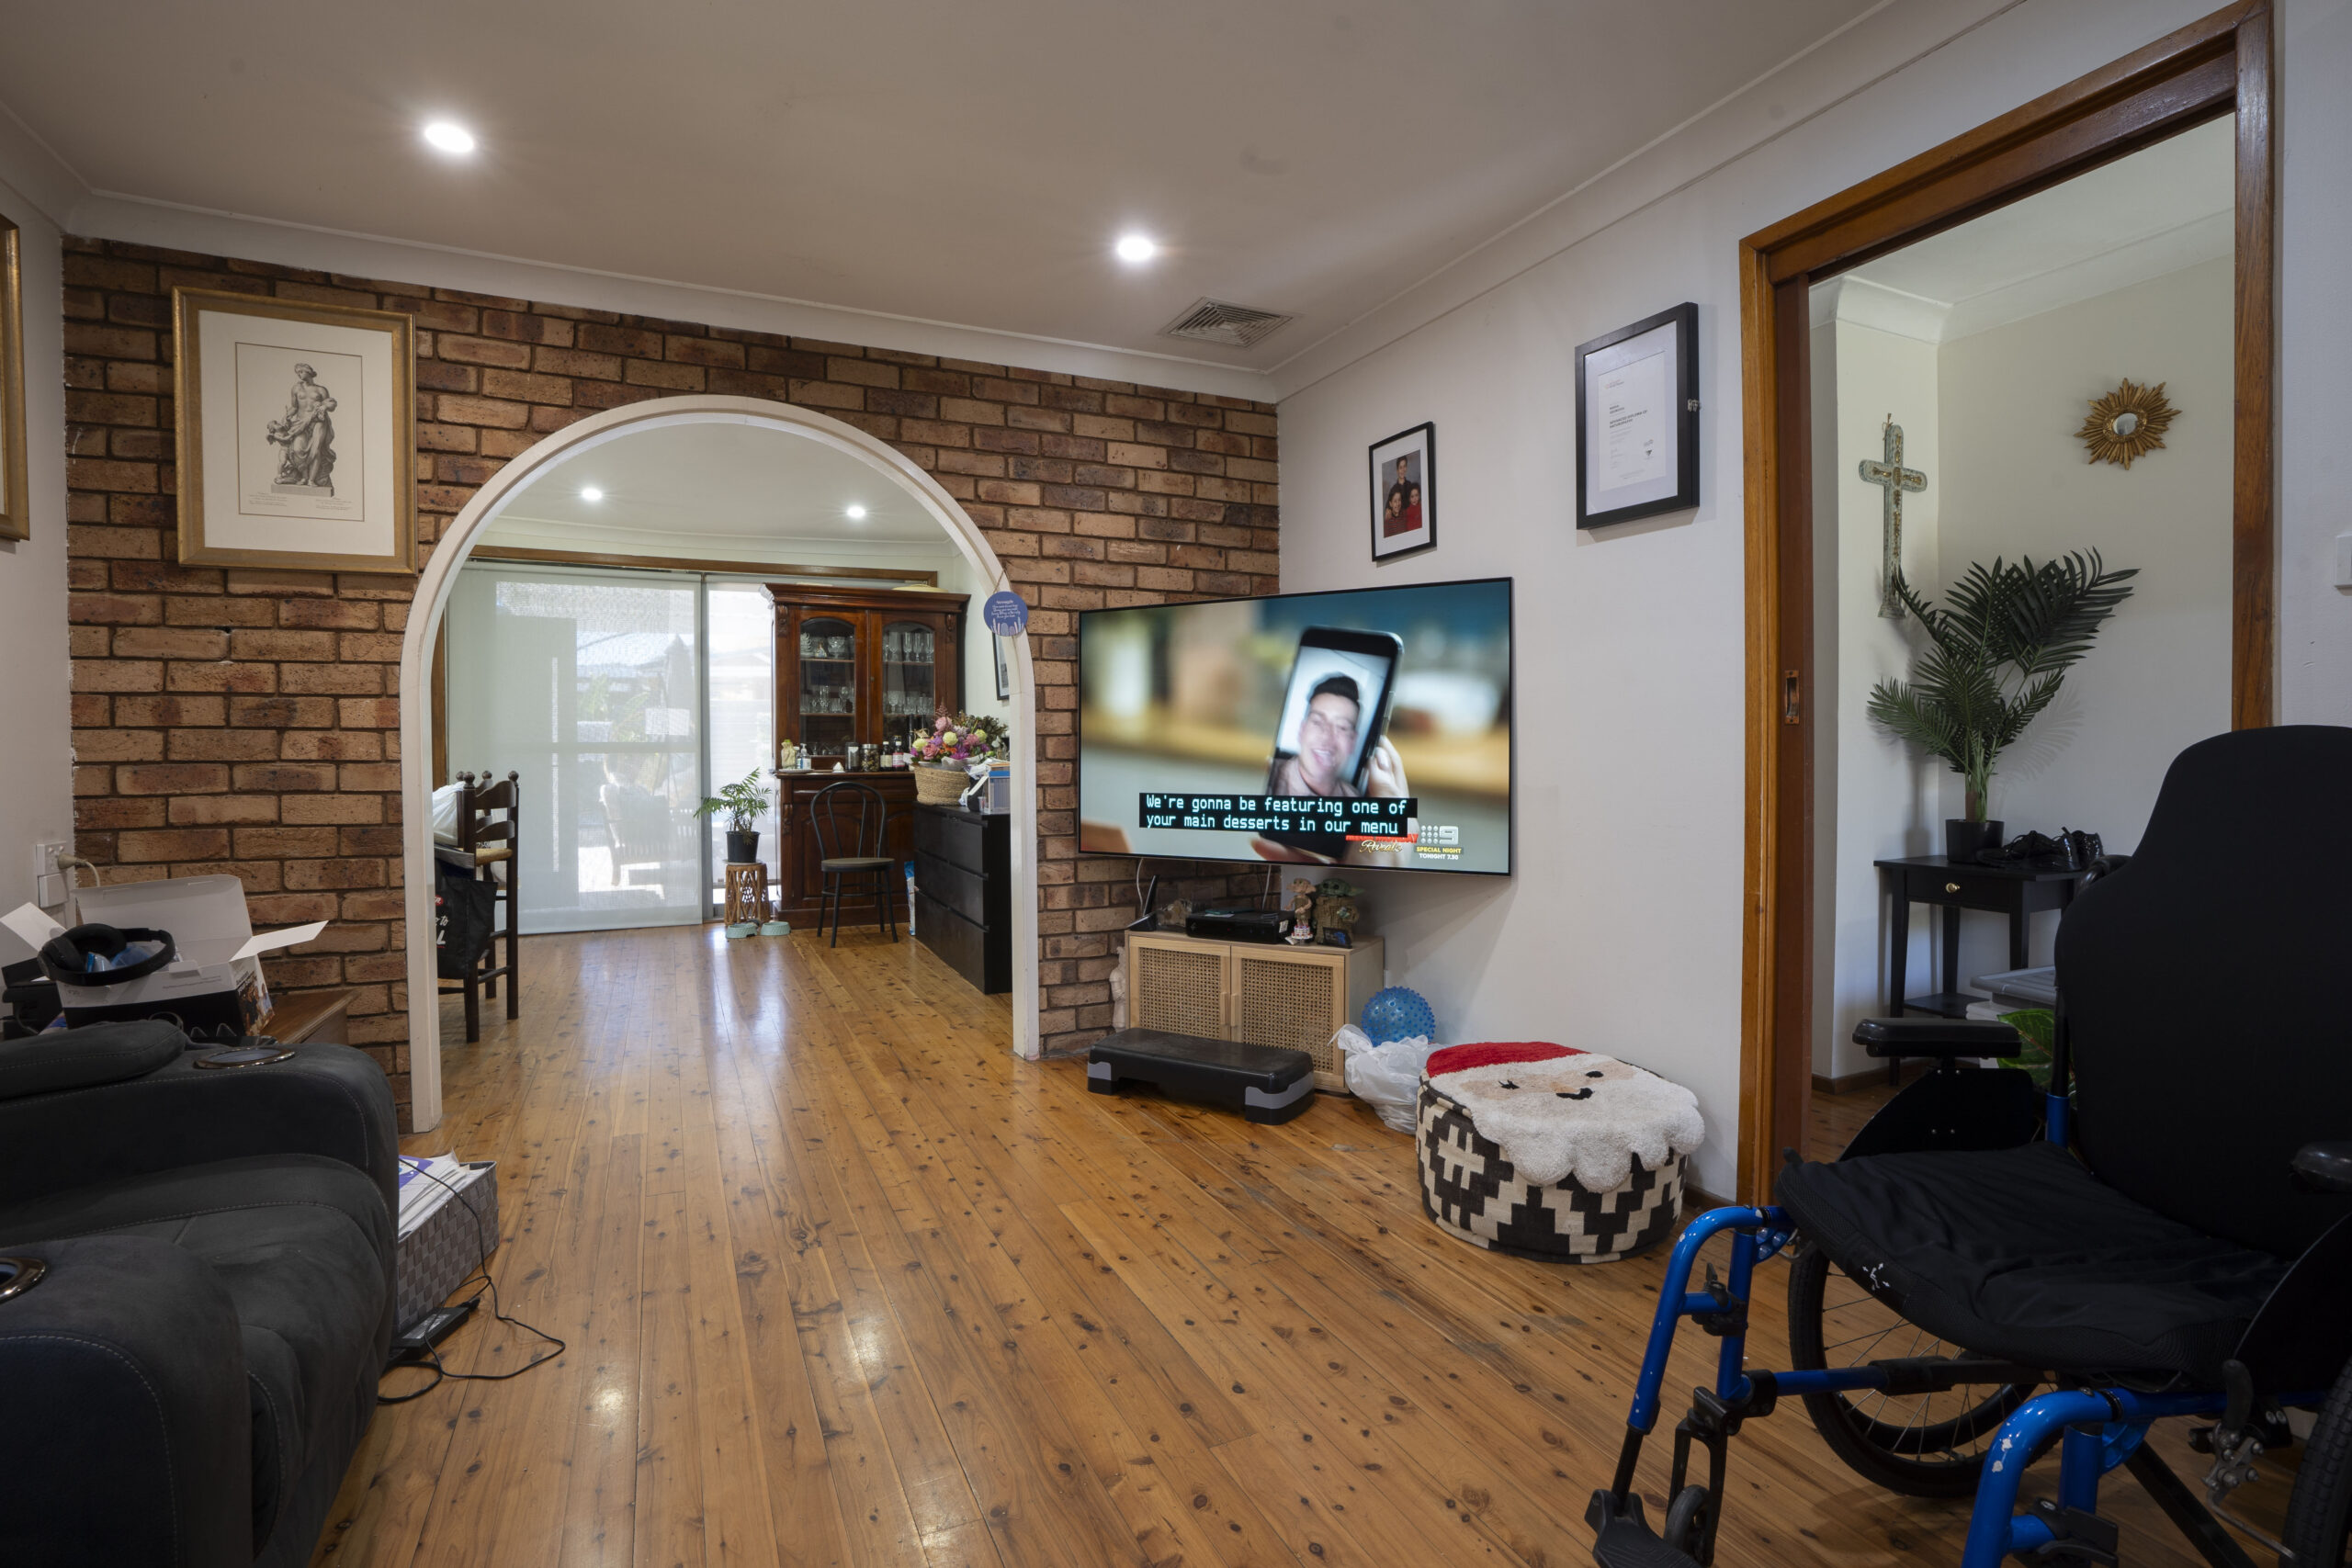
Imagine a living room so dull, even the furniture is planning its escape! In this room, furniture was pushed up against the walls, creating a no-man’s land in the centre of the room. A doorway awkwardly slices the room, and the TV’s shoved in a corner like a poor afterthought. Maria is constantly parked on her couch, far from the TV, with a parade of people constantly walking past, blocking her view. Not the most ideal of living room layouts!

Before: A room with tons of wasted space & nothing that makes it inviting & comfortable.
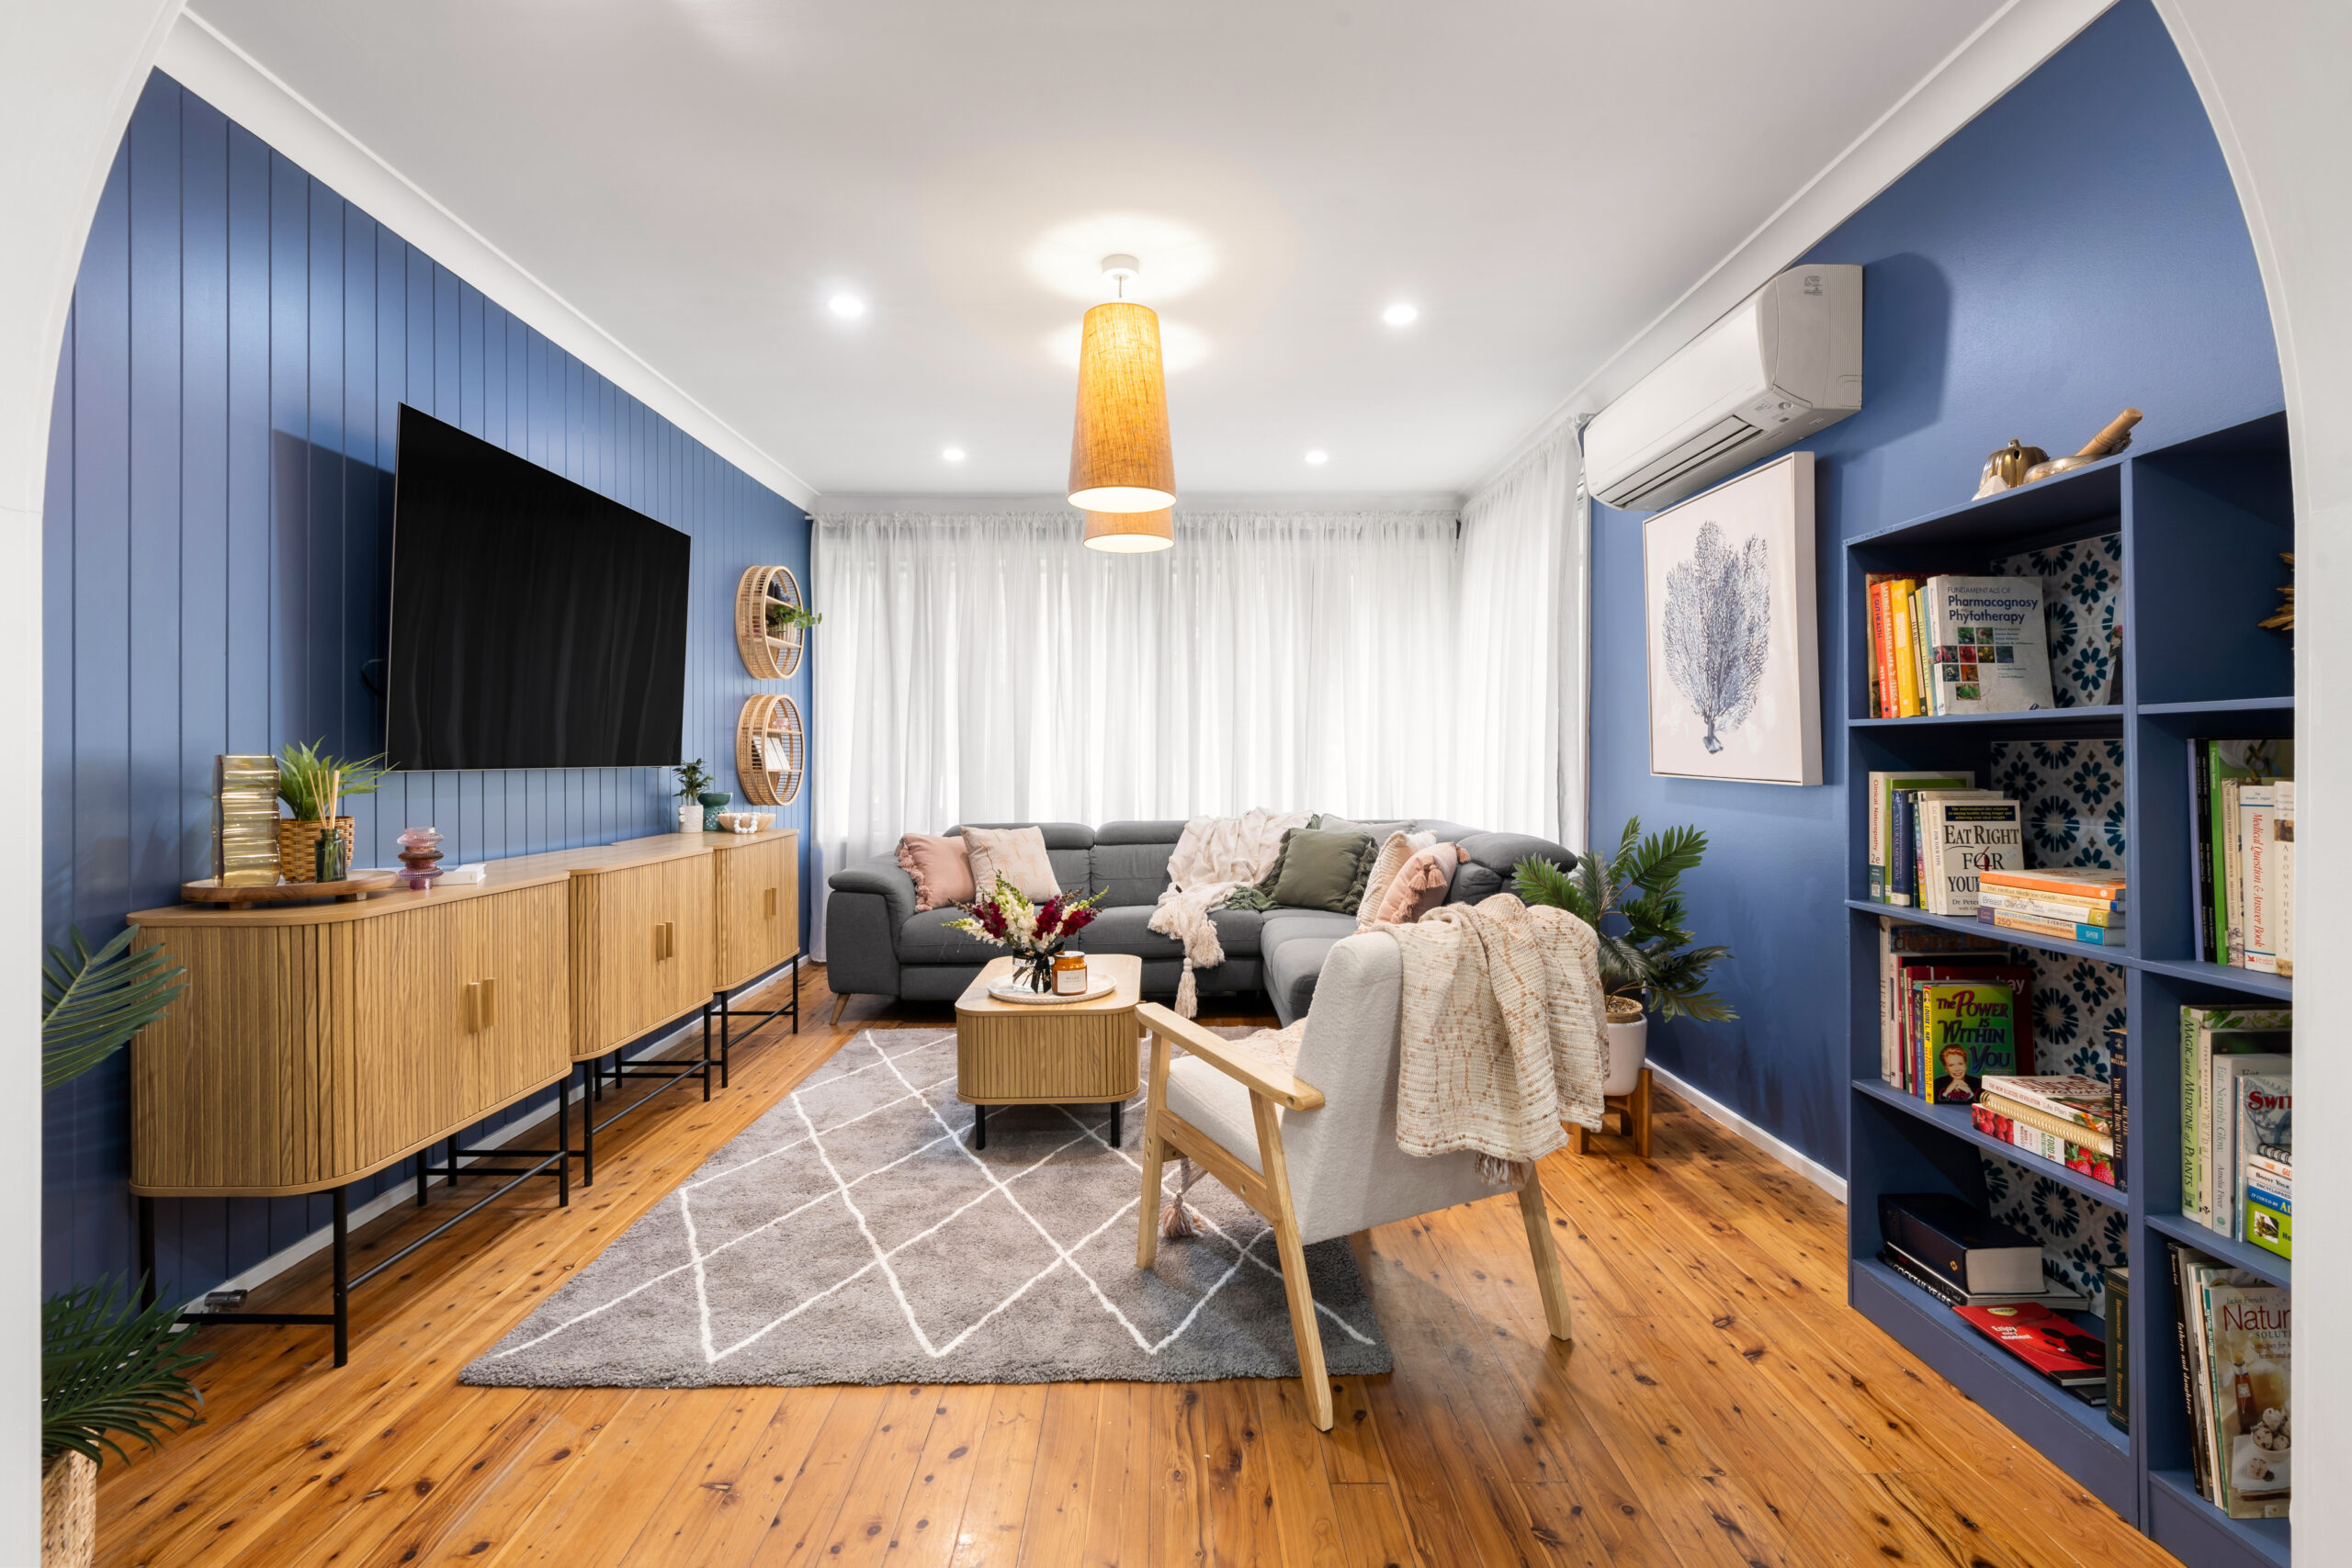
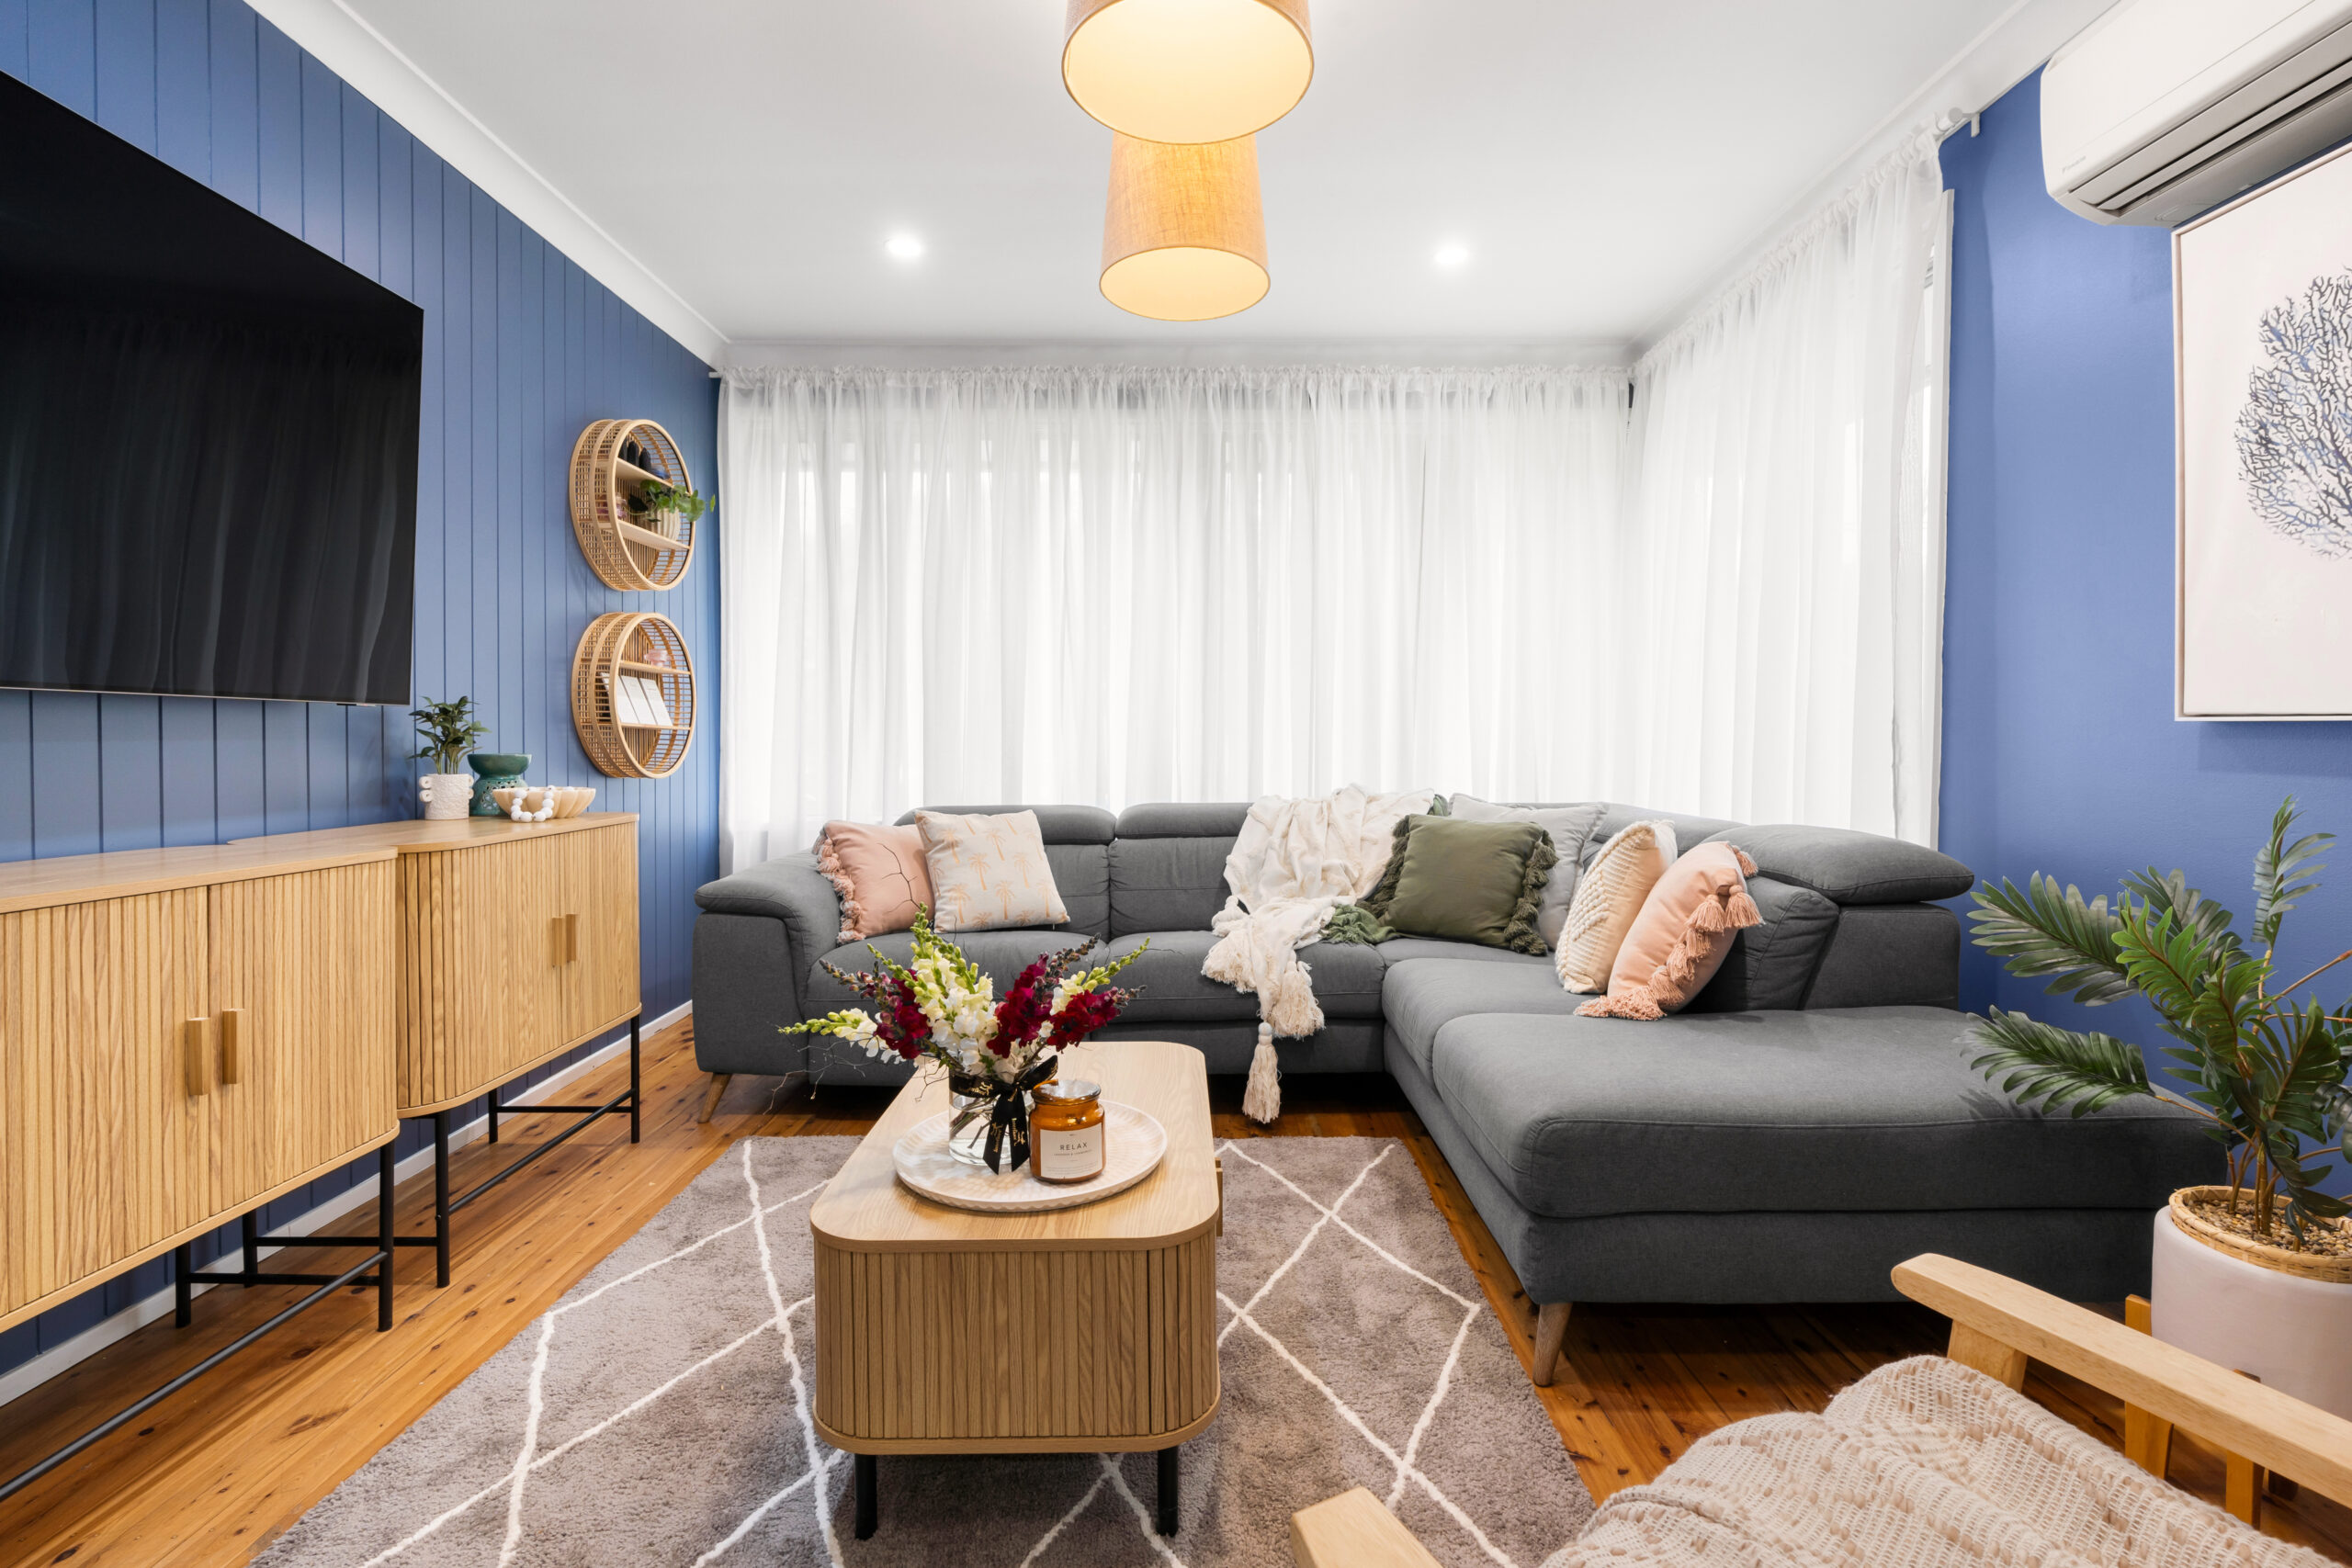
First off, we tackled that pesky doorway. I wanted to address this oddly placed doorway and get the room orientated correctly to maximise the space. With that doorway there, three of the four walls in this room were taken up either by the door, a large window or an archway. Even though I only had 1 day to renovate 2 rooms, I decided that closing the doorway in, was not negotiable & had to be done. My chippies quickly erected a timber stud frame into the doorway then clad the whole wall with Easycraft’s VJ100 cladding. Using this wall cladding instantly eradicated the need for plasterboard installation, gyprock setting, drying time & sanding which all takes time & costs money. Within just a few short hours, the doorway was covered up, like it had never been there! It now gave me one solid wall to squeeze storage cabinets onto & mount the TV centrally into the room, utilising its vertical wall height, instead of valuable floor space.
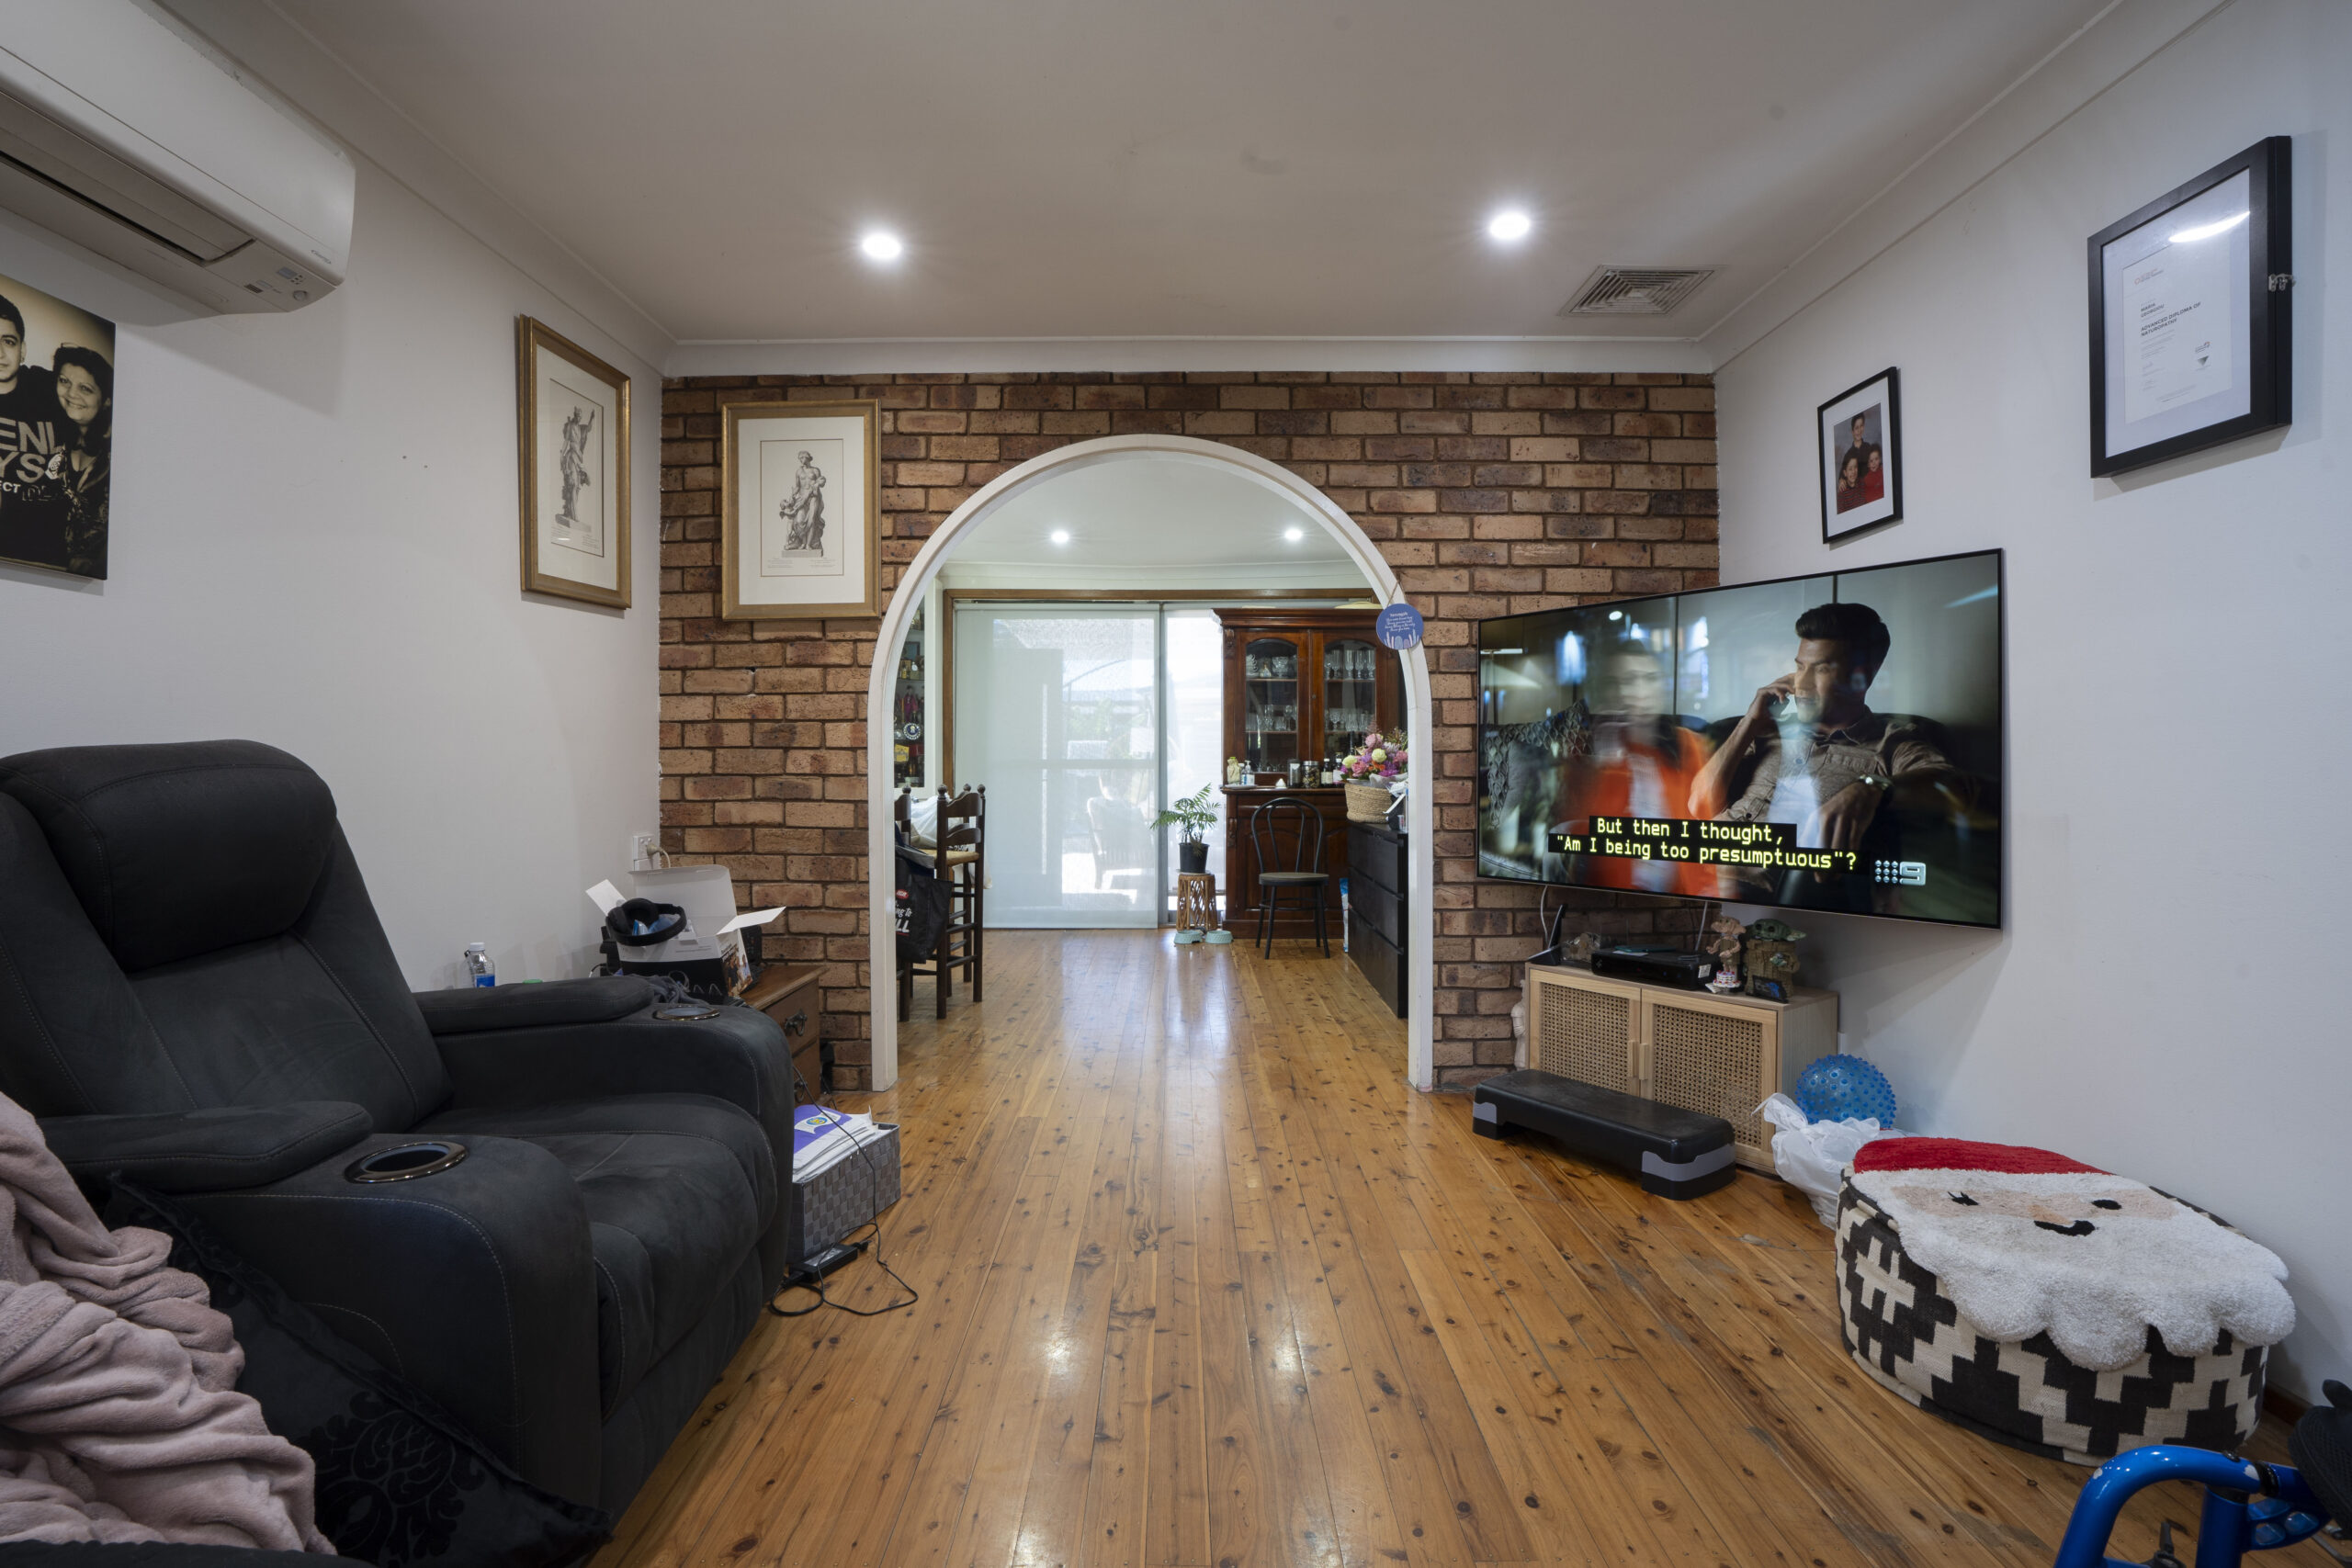
Before – A heavy brown brick wall & archway visually dominates the room.
Now I’m sure you’ll all agree this living room was pretty bland & boring. But fear not, for we were inspired by the azure seas and white sands of Greece. A proudly Greek family, it was a no brainer to give the room a Mediterranean feel. My team & I painted all the VJ cladding and opposing wall in Taubman’s Cape Blue, a vibrant blue that will remind Maria & Steve, fondly of their proud heritage. The large window, previously obscured by unattractive vertical blinds, got a simple style update with Ikea’s white sheer Hilja curtains. They provide privacy but are slightly sheer so they still allow light to filter into the room. With multiple packs purchased, bunched up and hung high, these curtains add elegance to the room on a shoestring budget.
Click & drag the arrow left & right to see the full before & after transition.
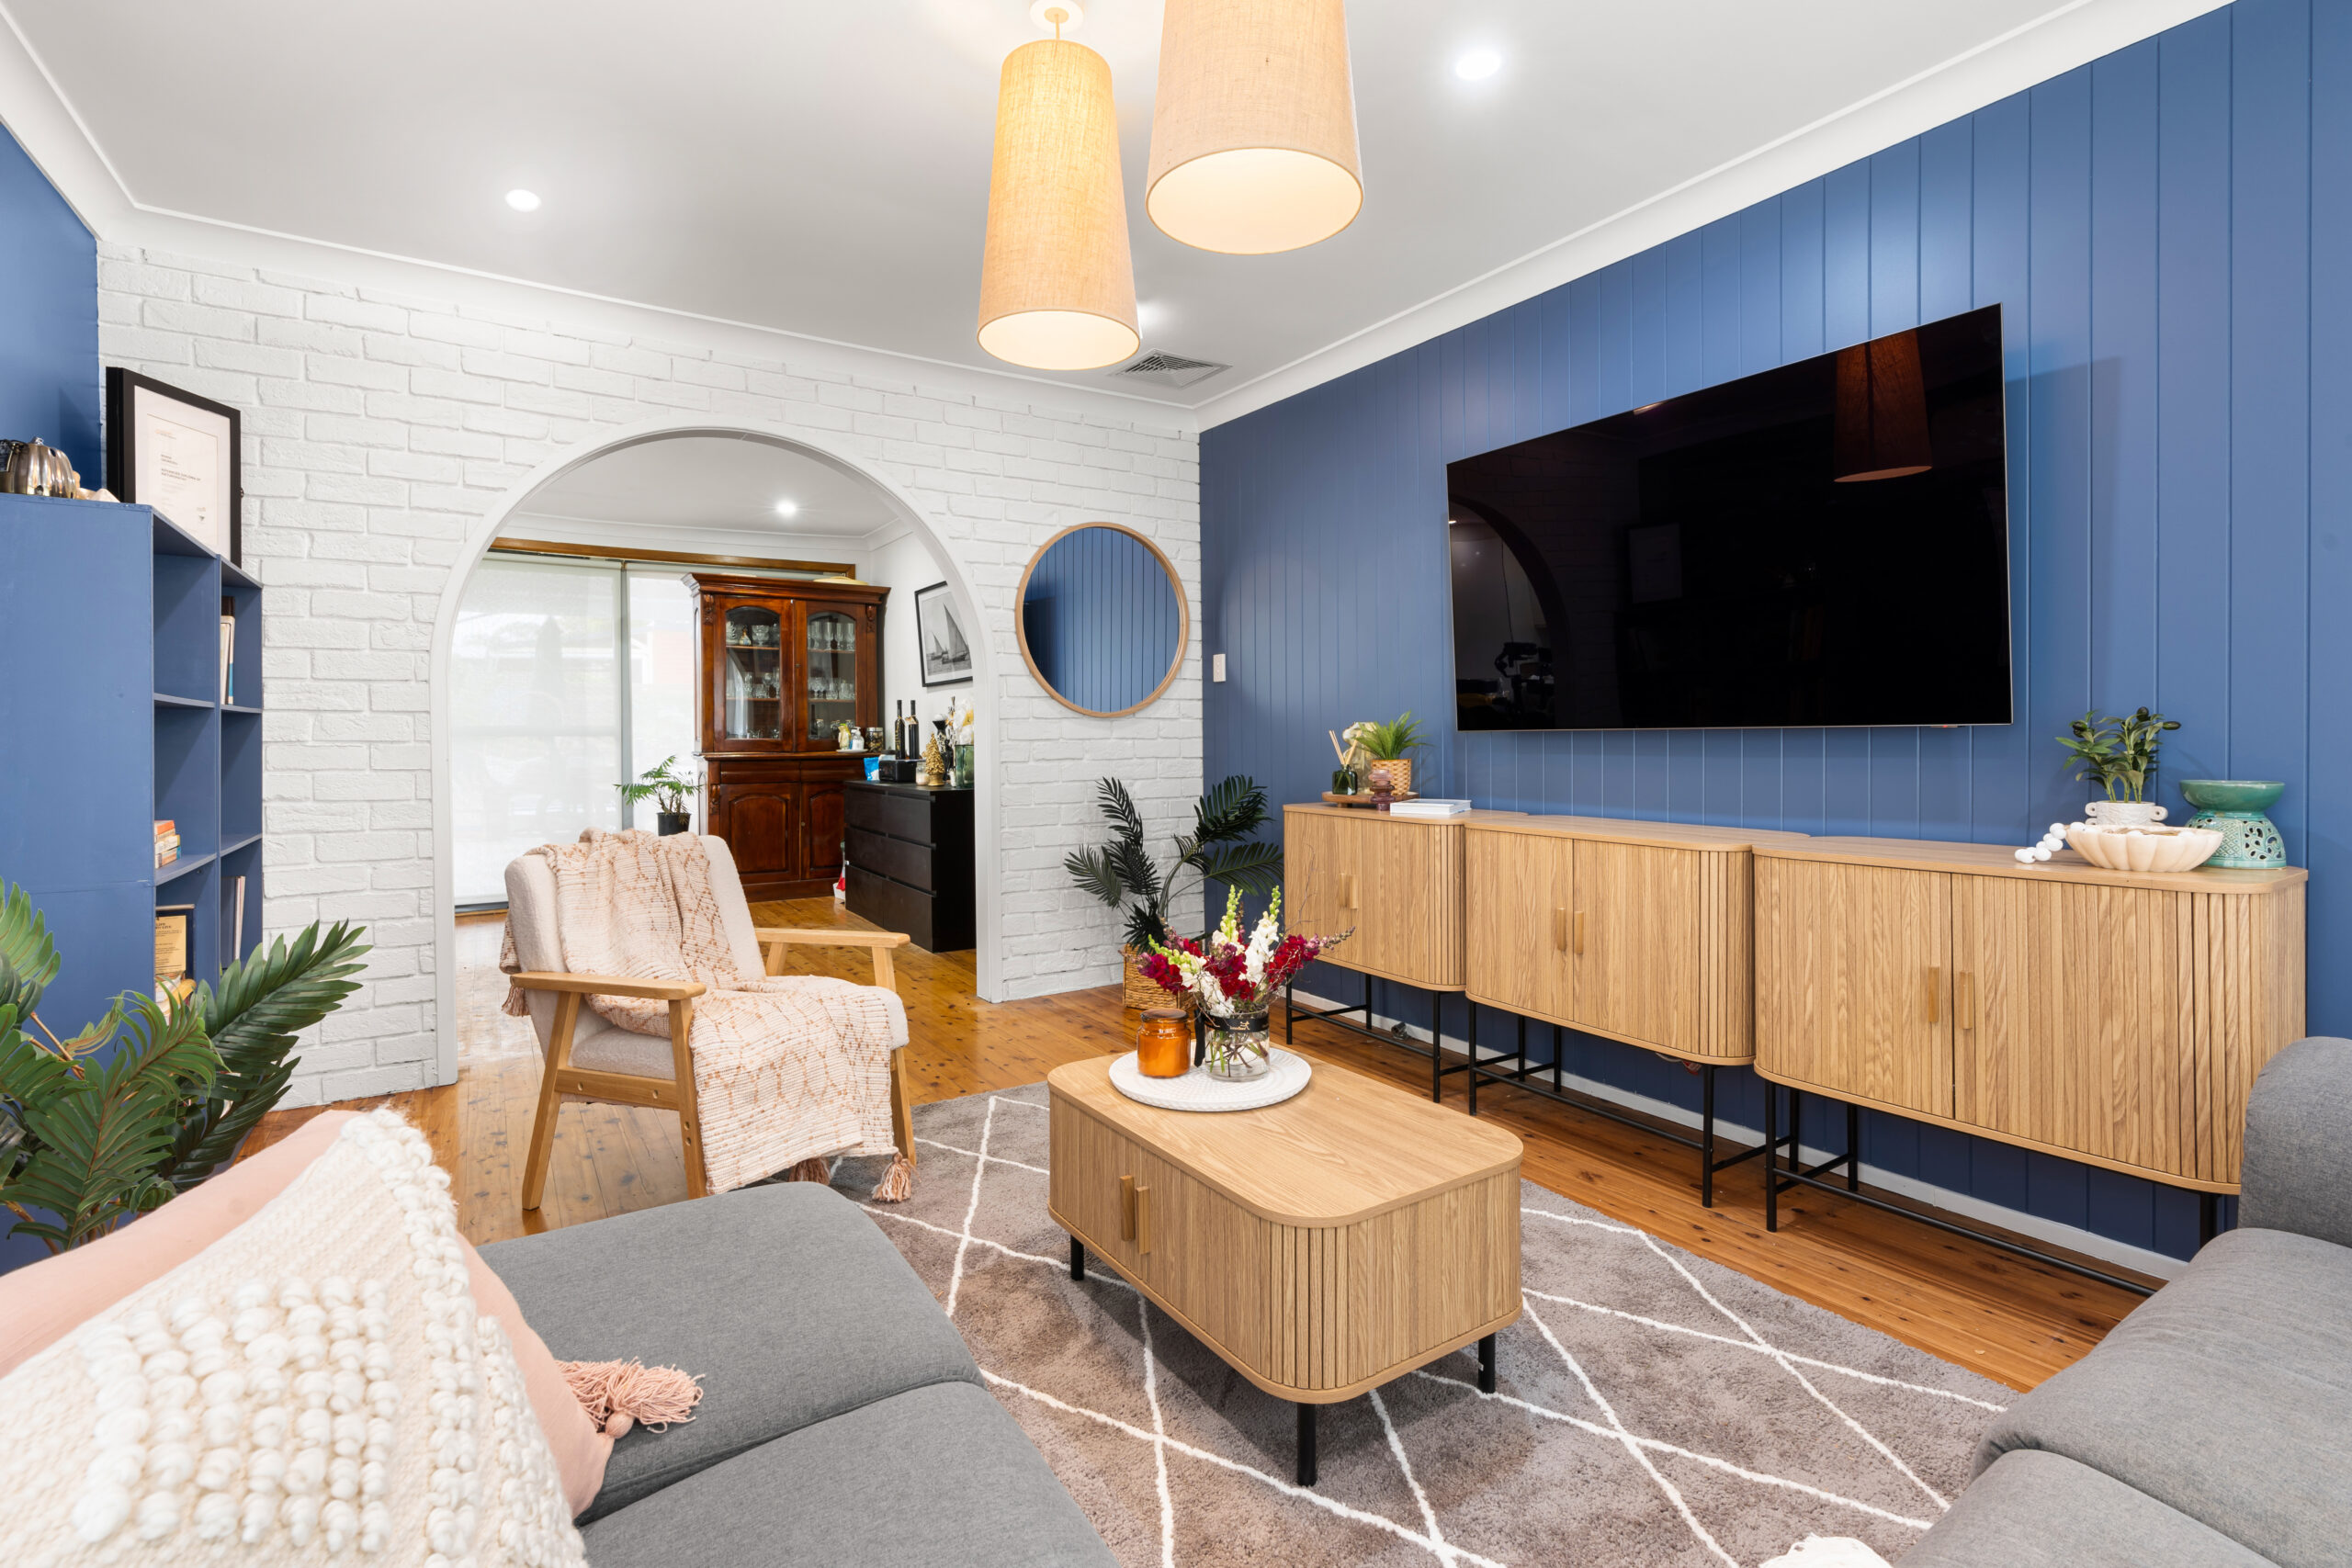
The other end of the room featured a visually dominant brick wall, with a large archway that transitions you into the dining & kitchen areas of the home. With no time to structurally alter that archway (which is currently very on trend anyway), I opted to paint the bricks instead, choosing Taubmans “Cotton Ball”. By painting the brickwork in a warm white, the paint instantly tones down the colours of the bricks, instantly lifting the room visually & tieing it more cohesively with the blue on the other walls.
To add more character & texture to the room, my sparkies installed the Calido Tall Tapered Shade in Tan Linen colour from Beacon Lighting. Going with two pendants adds visual interest to the room, especially since this room is quite long & skinnier in width.
Click & drag the arrow left & right to see the full before & after transition.
Styling wise, the comfy couch stayed so I just tricked the room out with some warmer & textured styling. I stacked three storage sideboards together from Kmart’s Cooper range with the matching coffee table to tie the space visually together. Buying furniture from the same family of products is a super simple way to get clear design cohesion in any room of your home. The oak colour of those cabinets, tie nicely with the overhead pendant lights & the timber oak legs in Kmart’s Timber Boucle Chair. With the floor in perfect nick, all it took was a nice rug to add more warmth to the space.
Click & drag the arrow left & right to see the full before & after transition.
THE MASTER BEDROOM
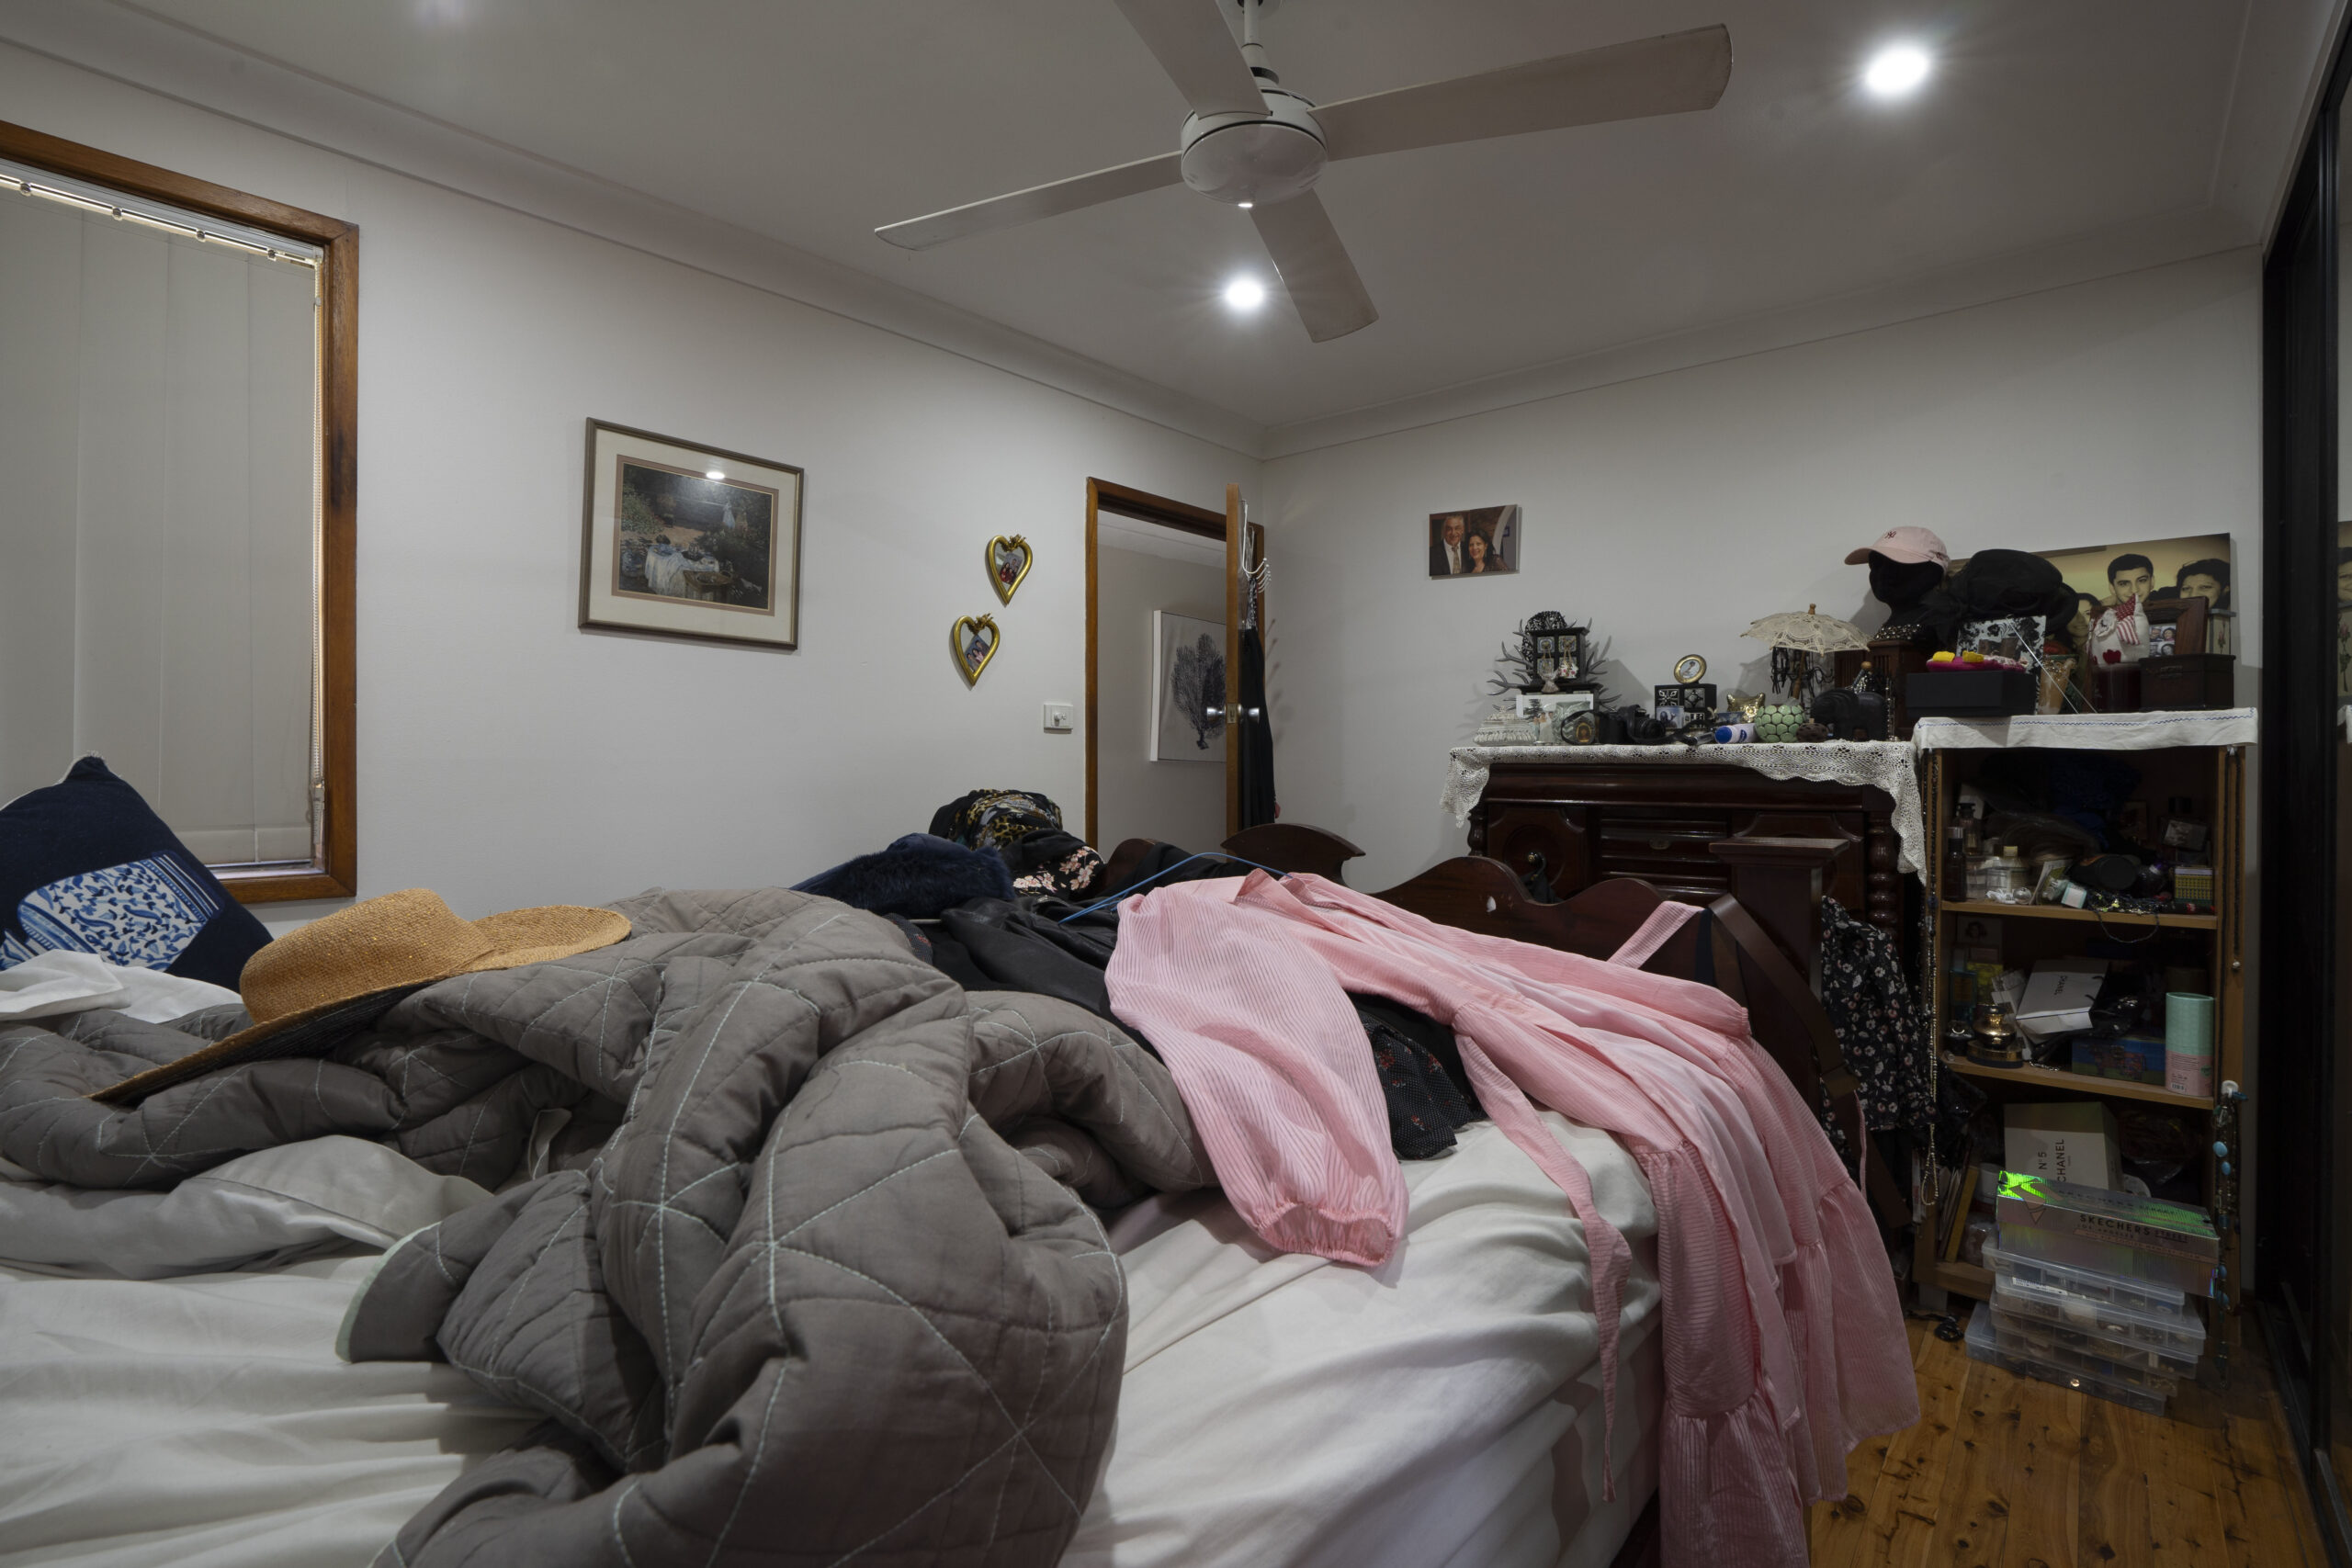
The other room to tackle in this home was Steve & Maria’s bedroom. Since Maria’s health has relapsed, she’s been sleeping every night on her living room couch. When your bedroom isn’t a relaxing & comfortable space for you to rest in, then its a good sign something needs to be done!
This bedroom was very tricky to address. With such a short time frame, any large construction or structural renovation changes were out of the question. There’s a large built in wardrobe that had to stay & an unusual wrap around window that covered one entire wall and parts of the other two. The remaining walls were too short for a bed so unfortunately the bed had to stay, where it had always been. To have a bed directly under your windows is far from ideal.
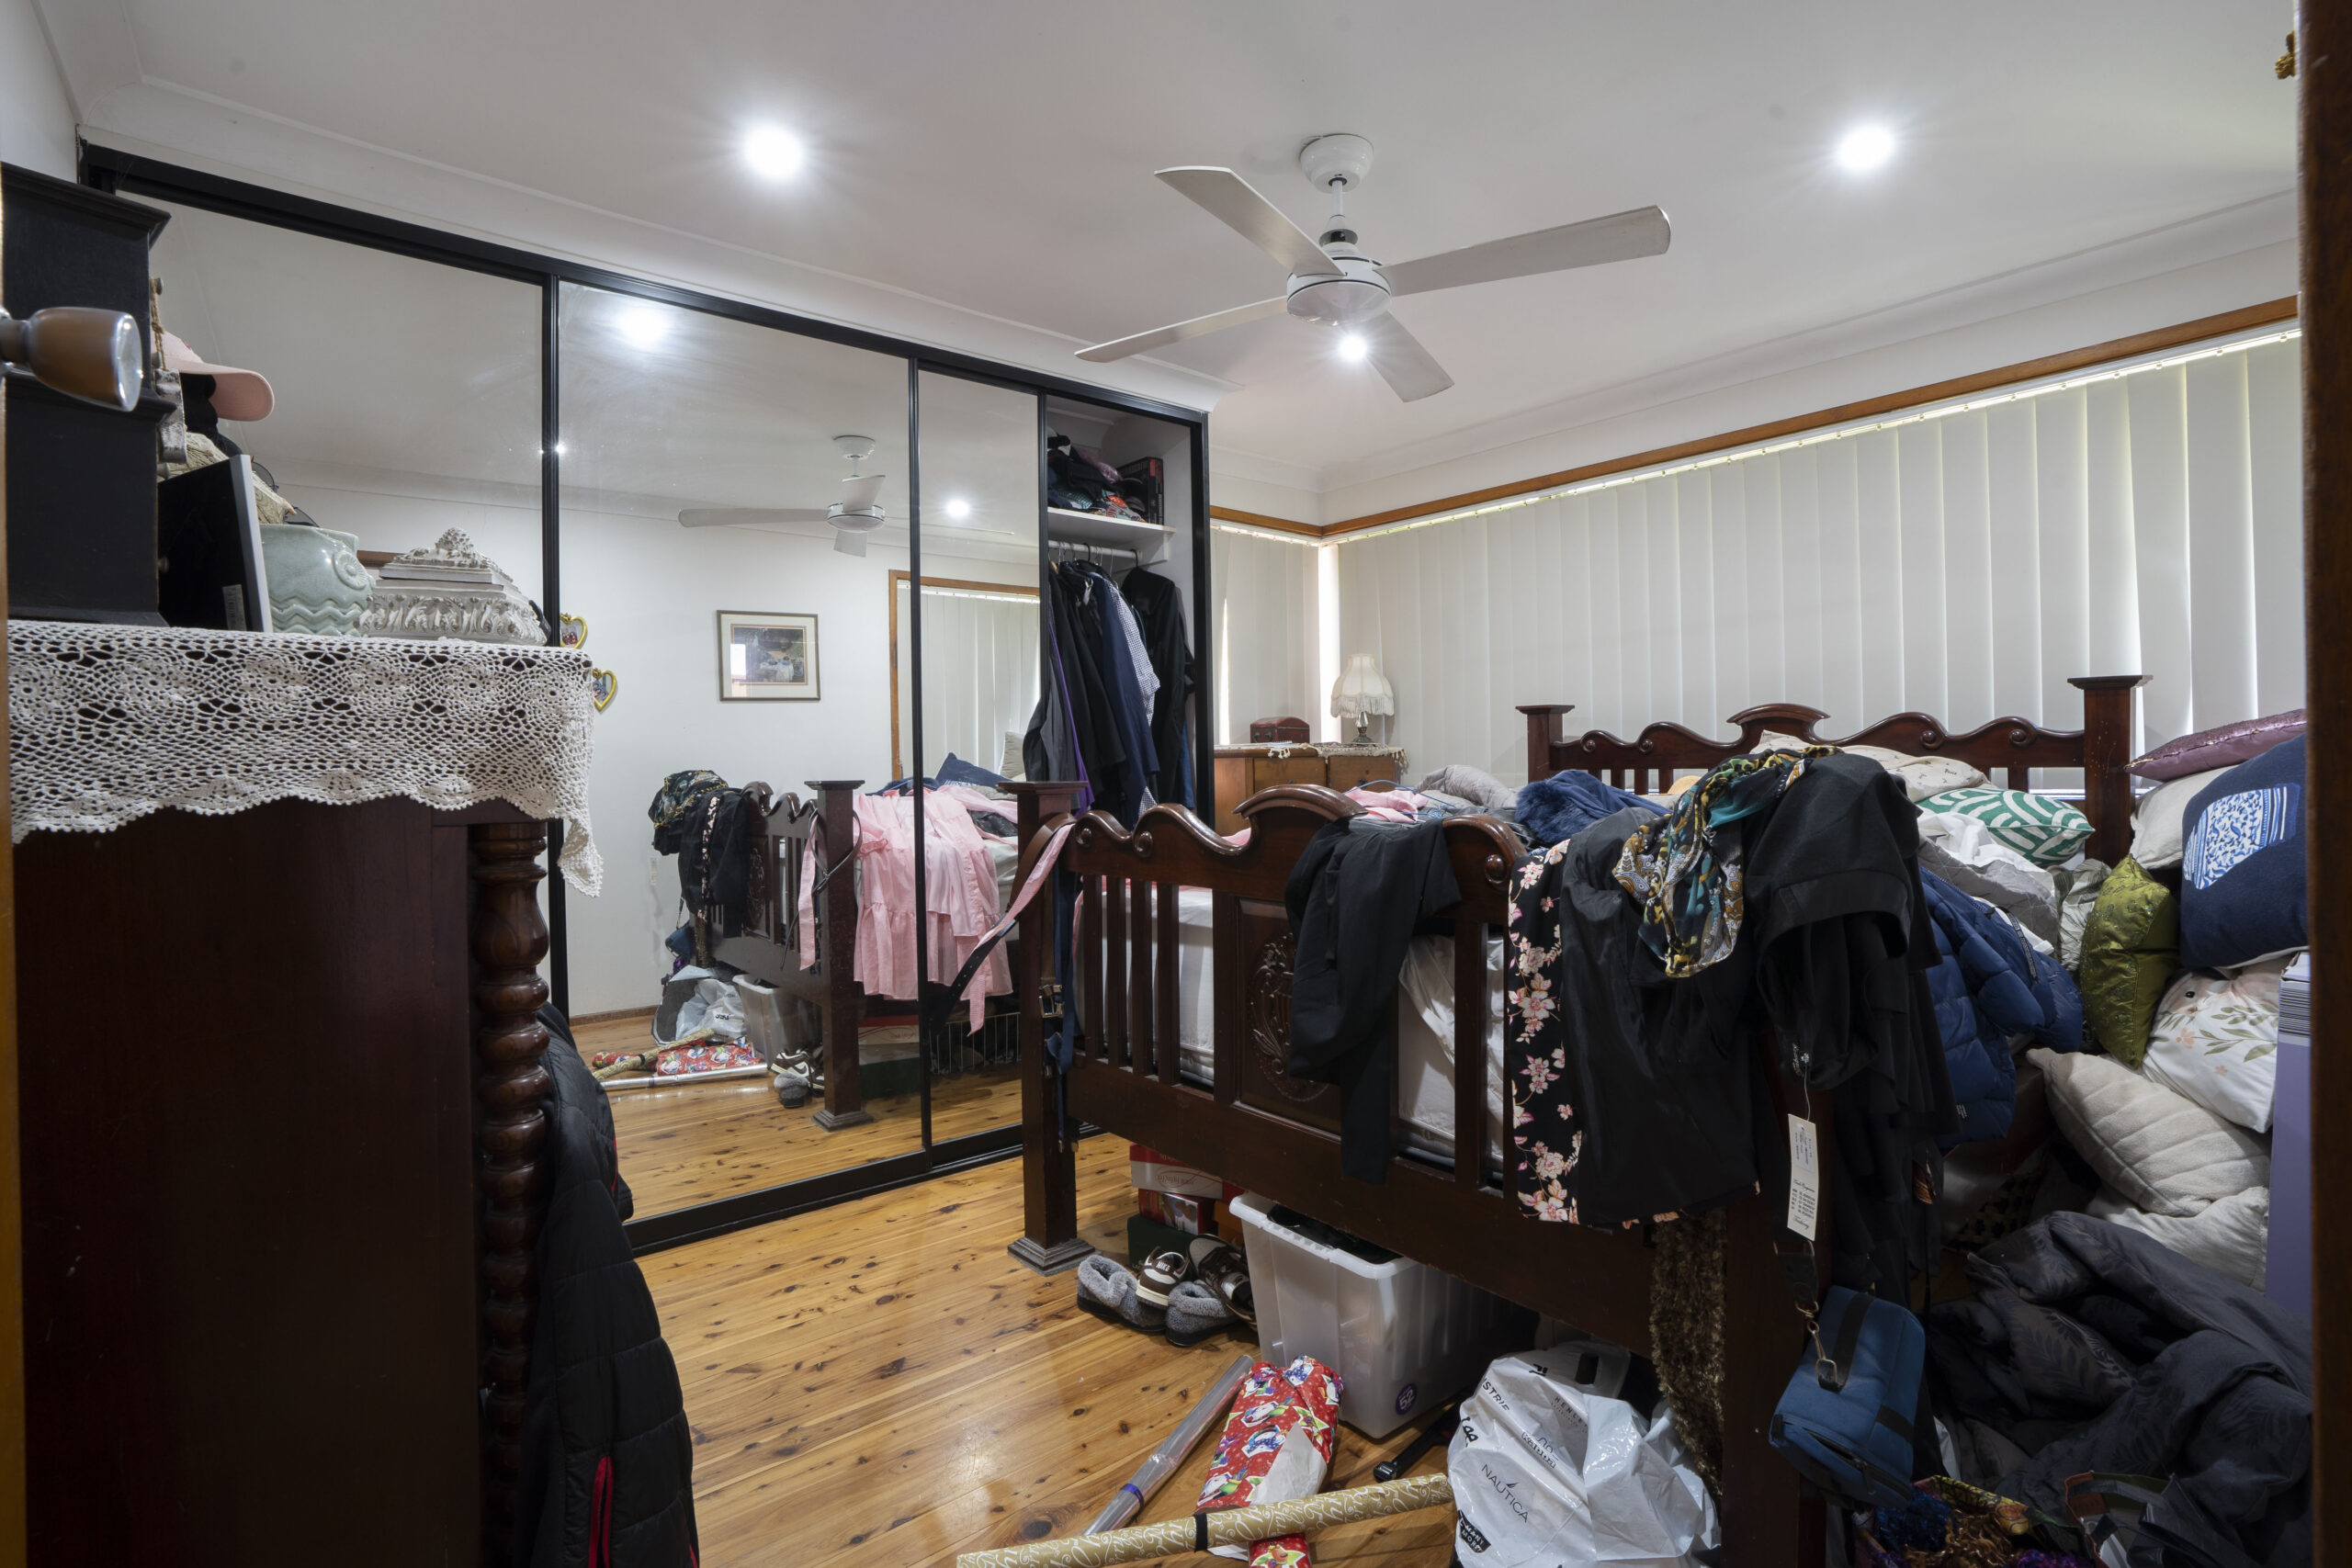
Before – this room had very restrictive design options including wrap around windows on 3 walls.
With no layout changes possible, I quickly turned my attention to the cosmetic aspects of the room & the furniture and furnishings. The queen size bed was so high you needed a ladder to climb up into it, another reason why Maria opted to sleep on the couch instead. It’s heavy, dark timber frame visually dominates the space, further reducing the sense of space in the room. I instantly knew it had to go and be replaced with something with better accessibility and a more standard height. Those vertical drapes were present once again, adding to the overall drabness of the room.

Before – the bedroom was visually bland & cluttered.
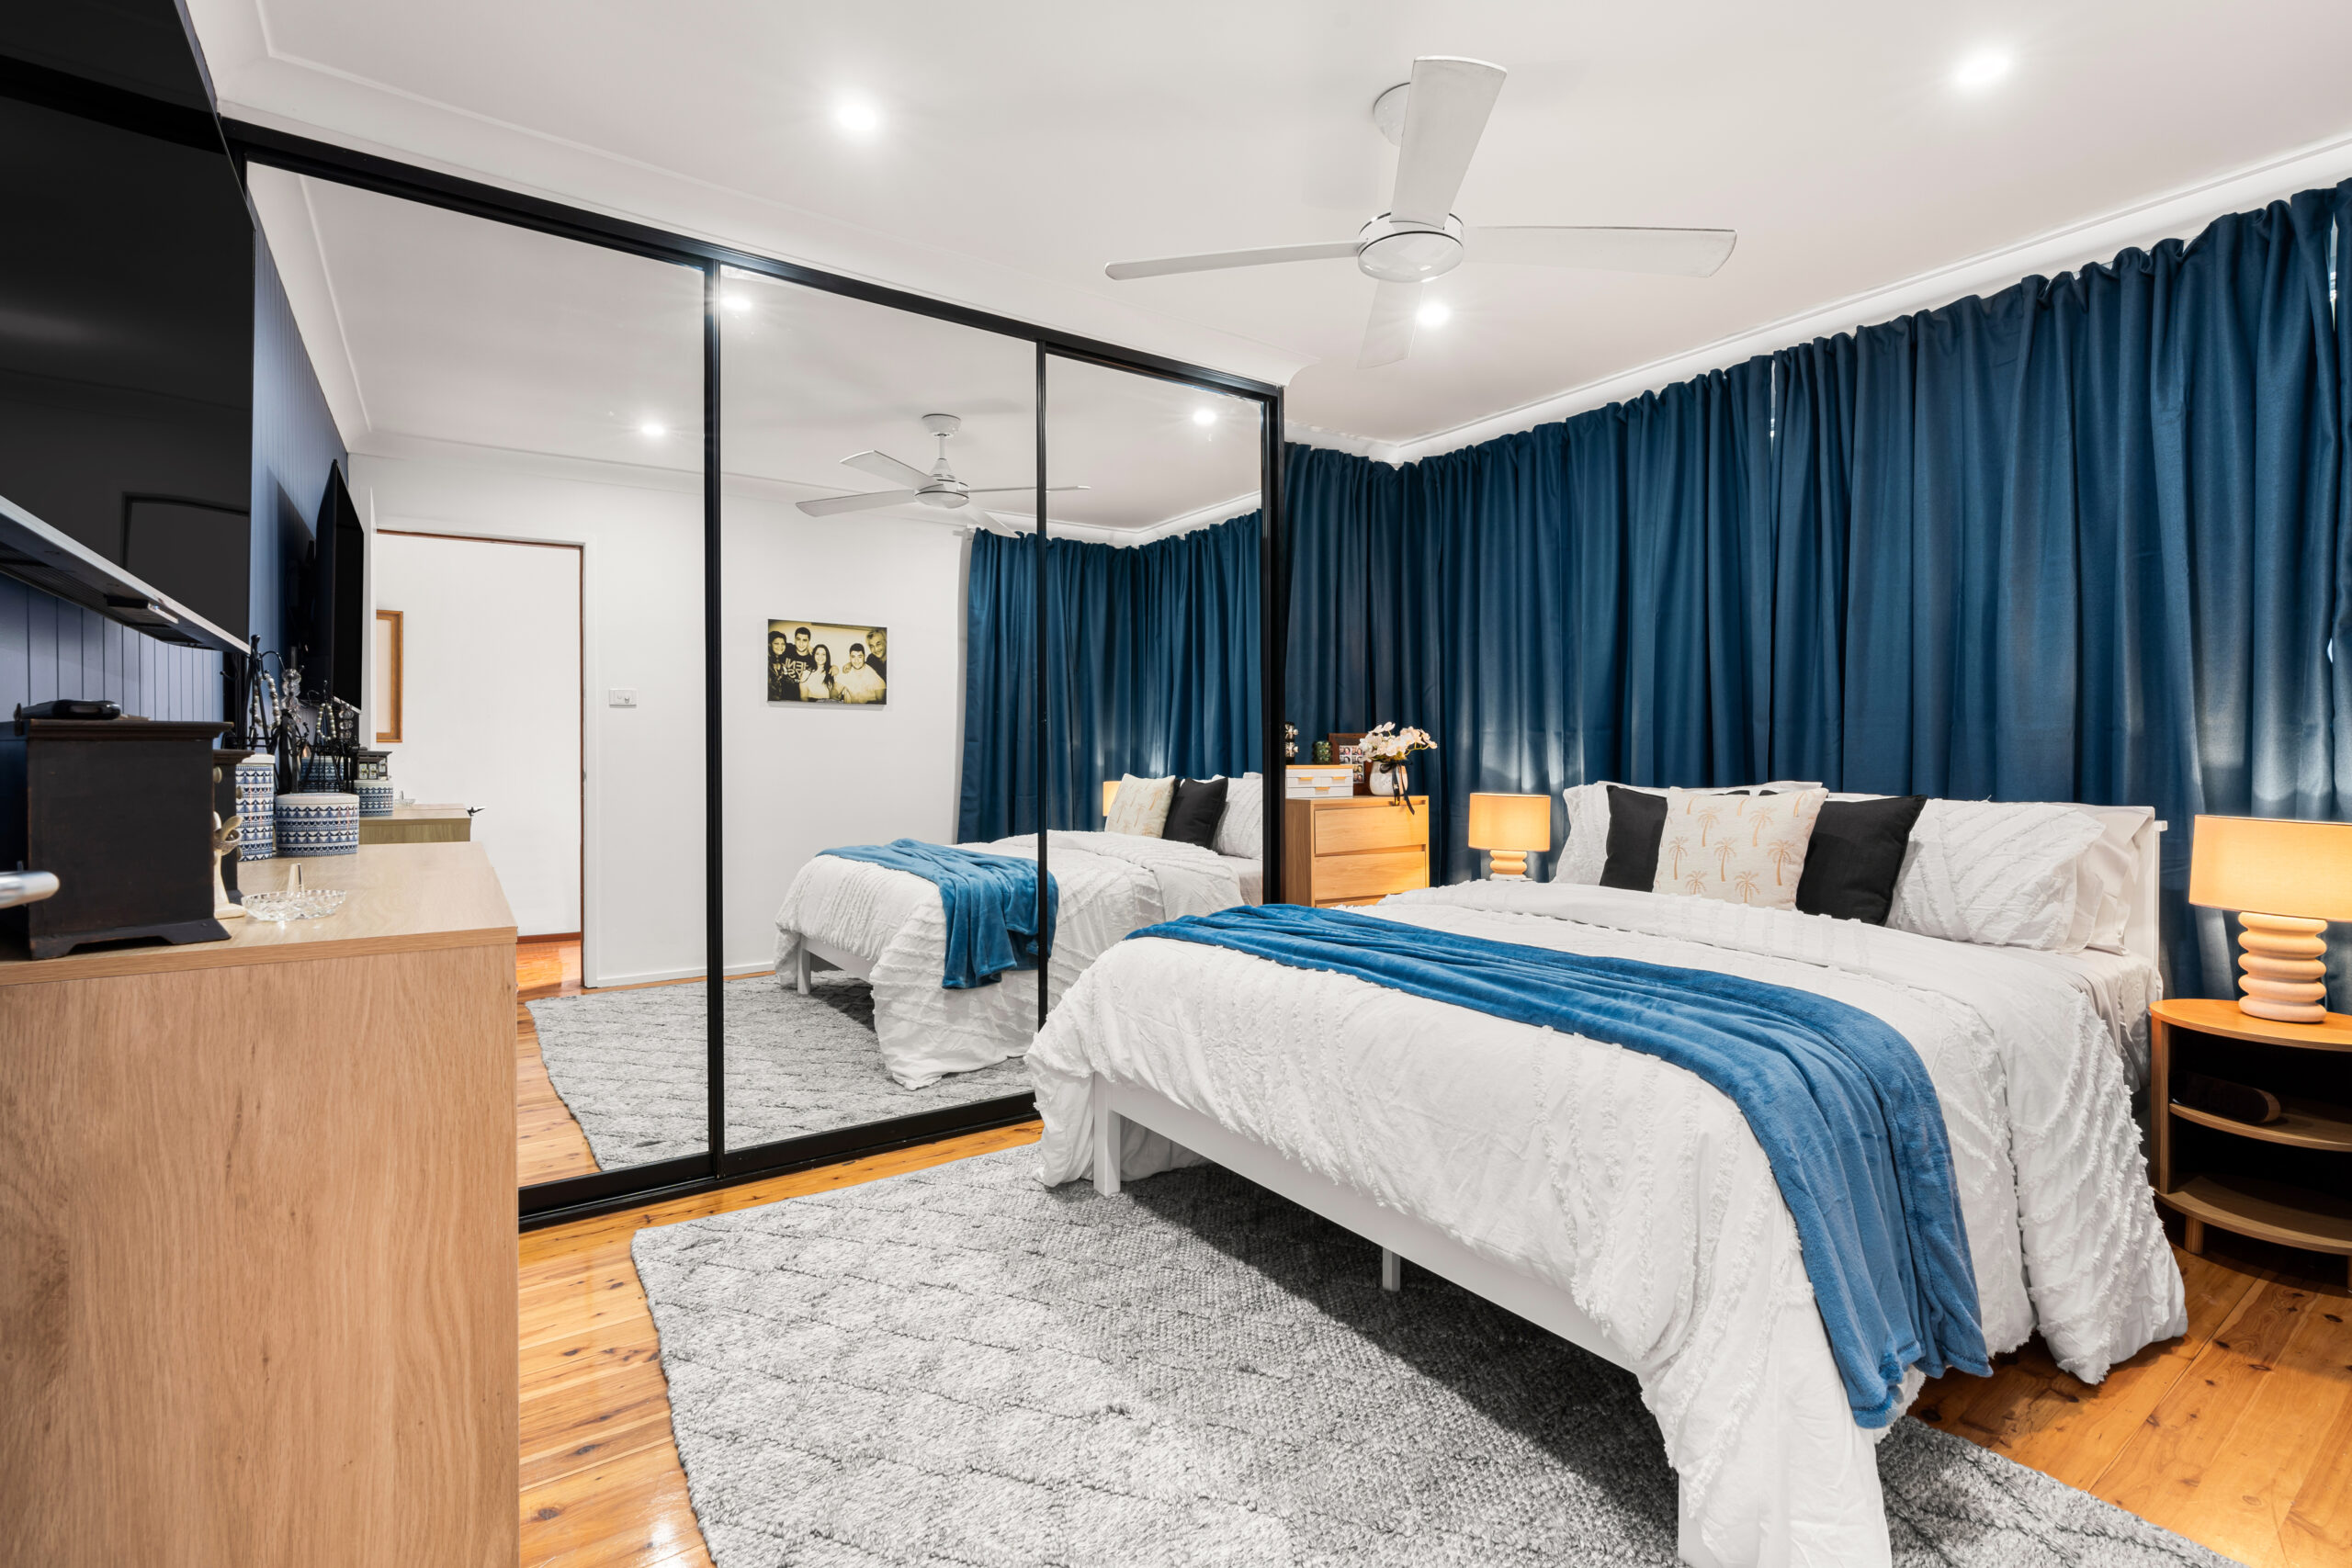
Armed with very limited design choices in this room, I focussed my attention on the window furnishings. I replaced the dirty vertical drapes with some lush blue curtains from Ikea to completely drown out the appearance of the not so attractive looking windows behind. These can be opened right to allow natural light in but also be closed off so Maria & Steve can get a proper nights rest.

Click & drag the arrow left & right to see the full before & after transition.
To lift the room visually, I created a TV wall, clad in VJ panelling to add texture and design continuity with Steve & Maria’s lounge room. The old bed, as high as Mount Olympus, was replaced with a more accessible model, ensuring Maria can now get in and out of bed, more easily. New bedside tables, lamps and a clothes dresser provide practical storage for socks, undies and foldable clothes. A new bedroom door from Hume Doors was installed for better acoustic qualities with the lounge room only metres away.

Click & drag the arrow left & right to see the full before & after transition.
Once thing is for certain, this bedroom ain’t going to win any design awards. It’s not ideal all round but is better than what they had before. Sometimes you just can’t make a room look great, if it’s fundamentally flawed to begin with.
All up, the full retail cost of doing this living room renovation & the bedroom was $13,553.18 including all the trade labour, materials, fixtures, fittings, new furniture & styling items at full retail rates (ex GST). Of this, $5,312 was trade labour & $8,241.18 for the purchase of all construction materials, fixtures & fittings, furniture and property styling items.
Broken down a little further, all the new lighting, the TV purchase & electrical labour came in at $2,909, carpentry labour was $2,400, the purchase of all carpentry materials such as the wall cladding, skirting boards, new bedroom door, nails, adhesives etc was $1,915, paint & painting labour was $2,214, new furniture & all property styling items $3,364 & rubbish removal costs $750.
Seeing Maria & Steve’s lounge room transformed into a space that not only heals but celebrates their heritage, was a victory as sweet as Greek honey. In the end, we didn’t just cosmetically trick up a few rooms; we paid homage to a culture rich in history, warmth, and hospitality. Opa!
As always, if you have any questions on this renovation, be sure to ask them in the comments box below & my team or I will answer them promptly for you.
Much Love,
Cherie x


I loved this. The fact you understood that some rooms are just not going to work without a huge cost blow out was lovely to see.
Staying true to the colours of Greece was a delightful way of giving the owners a chance to own it.
My heritage is Irish and I just love green, and my house has similar issues as Maria and Steve’s, so I am taking on board your knowledge, Cherie!
So glad you loved this Maria. Thank you for letting us know. Go the green! CB x
Hi Cherie, this is a great transformation, the owners must be stoked! I have brick walls in my own lounge room which I’m keen to transform. Any tips for painting brick walls would be greatly appreciated. Thank you!
Hi Michelle, glad you liked the reno! Painting internal brick walls is relatively easy. Brick are porous & will absorb a lot of paint if not prepped & painted correctly.
Step 1 – Preparation: Mask up any areas you don’t want paint to get on & lay drop sheets down to protect floors.
Step 2 – Remove any fixtures or fittings.
Step 3 – Cleaning: Thoroughly clean your brick wall(s) with a wire brush to remove dust, dirt & any efflorescence. Run your vacuum head over the brick wall to remove any surface dust. Use sugar soap to remove stubborn stains such as soot. Rinse well & allow to dry completely.
Step 4 – Repair: Fill any cracks or holes with a suitable gap filler. For larger repairs, consider using a mortar mix. Allow repairs to dry fully.
Step 5 – Sealing: Apply a quality sealer / primer & undercoat designed for brick surfaces. Products like Taubmans 3-in-1 fit are ideal. Apply the undercoat into all the mortar lines with a brush, then use a long nap paint roller (that’s not too wide) or a 100mm microfibre roller to paint the face of the bricks. Work in small sections at a time so you don’t see any cutting in marks between the areas you’ve brushed on versus rolled on. This step is crucial to ensure the paint adheres to the bricks & prevents moisture issues.
Step 6 – Painting: Choose a high-quality acrylic latex paint. For the first coat, you might need to thin the paint slightly with water (follow the paint manufacturer’s guidelines) to ensure it penetrates the brick’s porous surface. Apply 2 coats of paint in exactly the same way as your sealer / undercoat. Allow each coat to dry properly, before applying your next coat.
Please note, painting your brick wall via spray gun is so much faster but not always possible internally due to overspray. Using a spray gun is best done when your house is empty and your other walls & ceilings haven’t yet been painted.
Remember, the key to a successful paint job on internal brick walls is thorough preparation & using the right products. Stores like Bunnings can also provide advice on the correct paints to use as well. Happy painting, CB x
Hi Michelle, Cherie has now filmed a video on How To Paint Internal Brick Walls which you may want to check out on her YouTube channel. Link following. Cherie Crew x https://www.youtube.com/watch?v=8bY_vKasF70